Category Archives: Engine Builds

450 Horsepower – 500 LB-FT Torque Ford 351W (Windsor) 393 Stroker

450 Horsepower – 500 Lb-Ft Torque Ford 351W (393 Stroker)

JMac Performance put together a 450 Horsepower – 500 Lb-Ft torque 9.75/1 Fuel injected 351 Windsor/393 stroker Small Block Ford. The goal with this build was low RPM high Torque that could move a 4000 pound 56′ Mercruiser, run on pump gas, and have the street manners to be a daily driver.

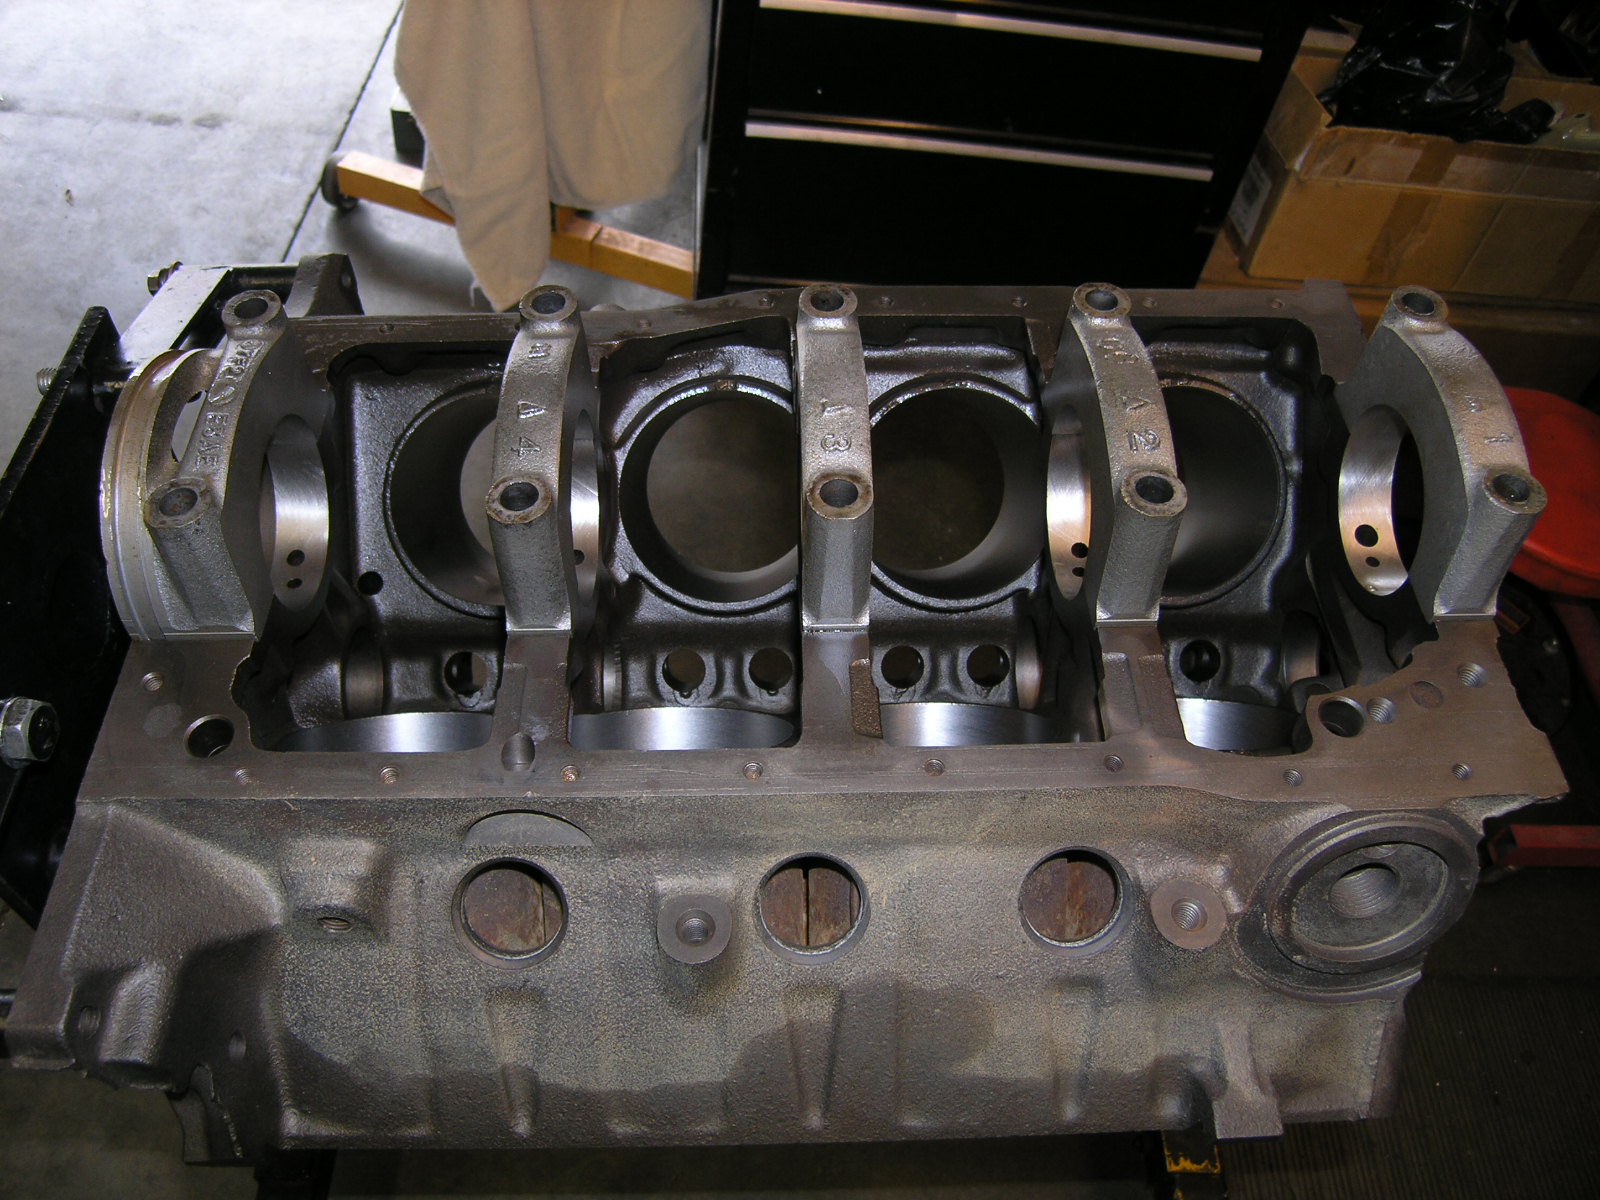
Ford 351W (393 Stroker) “The Foundation”

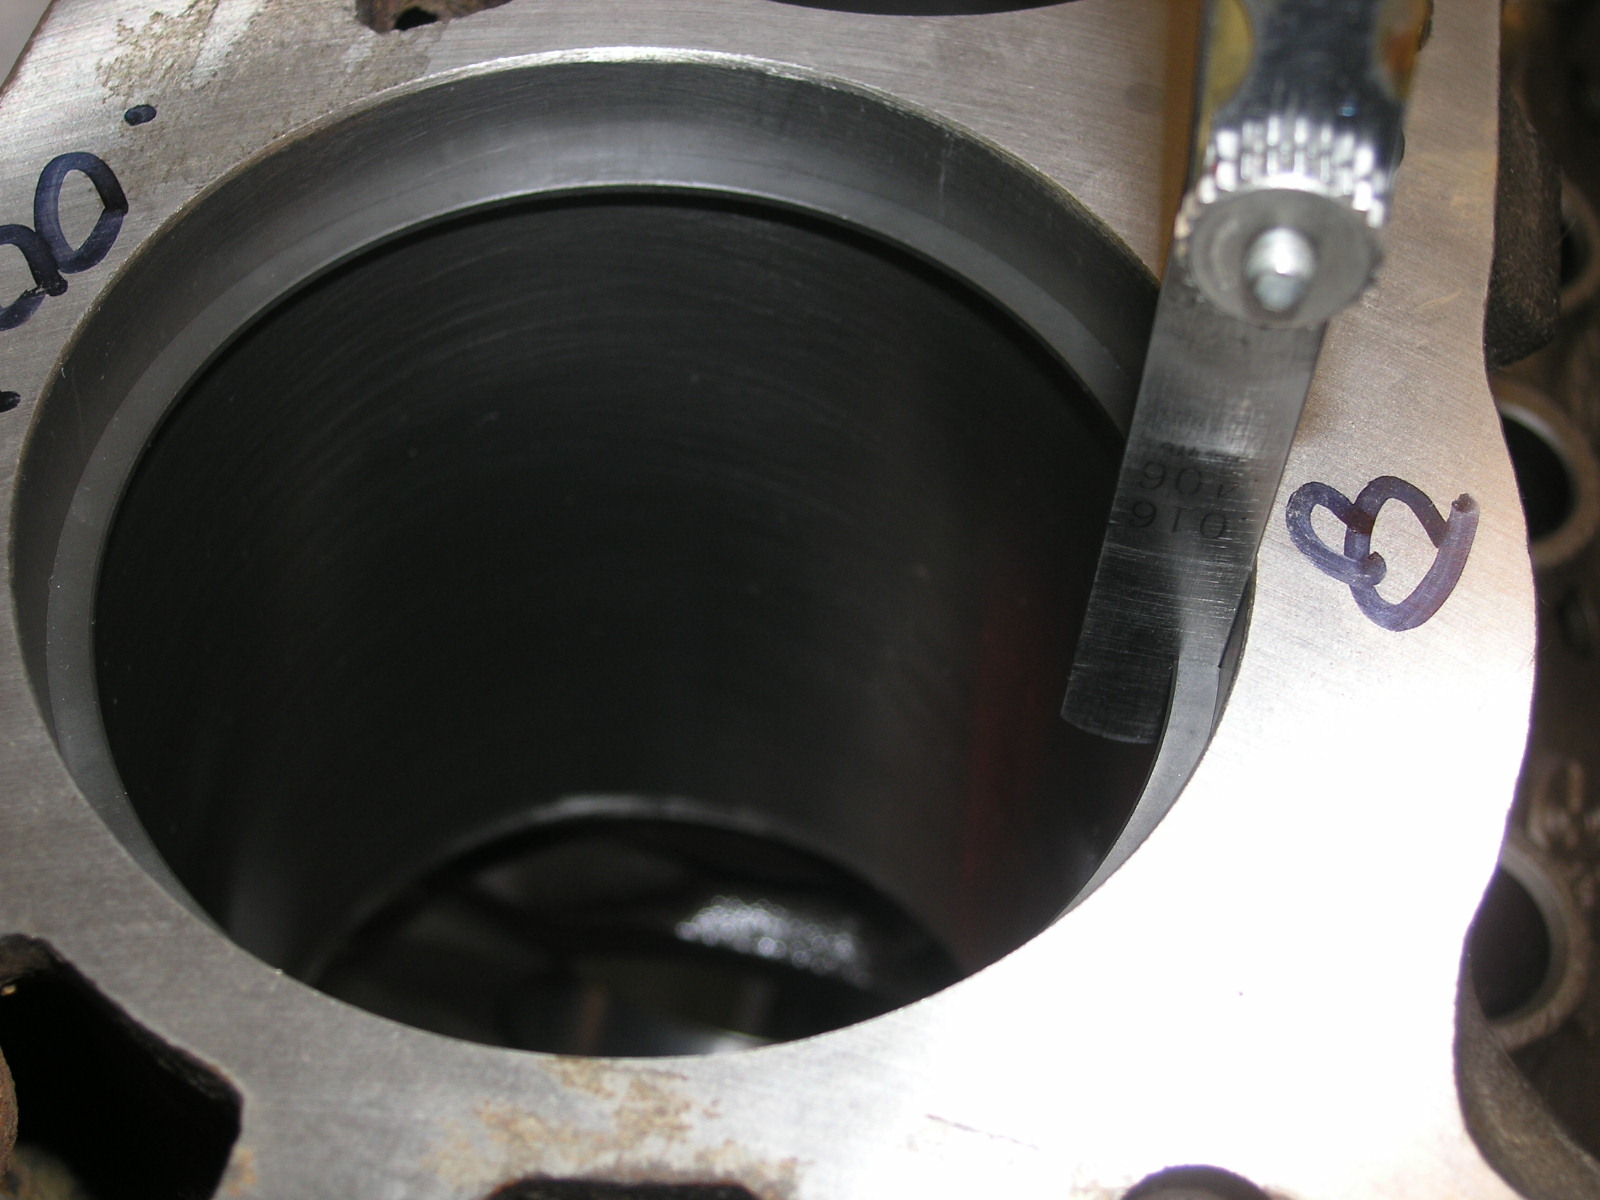
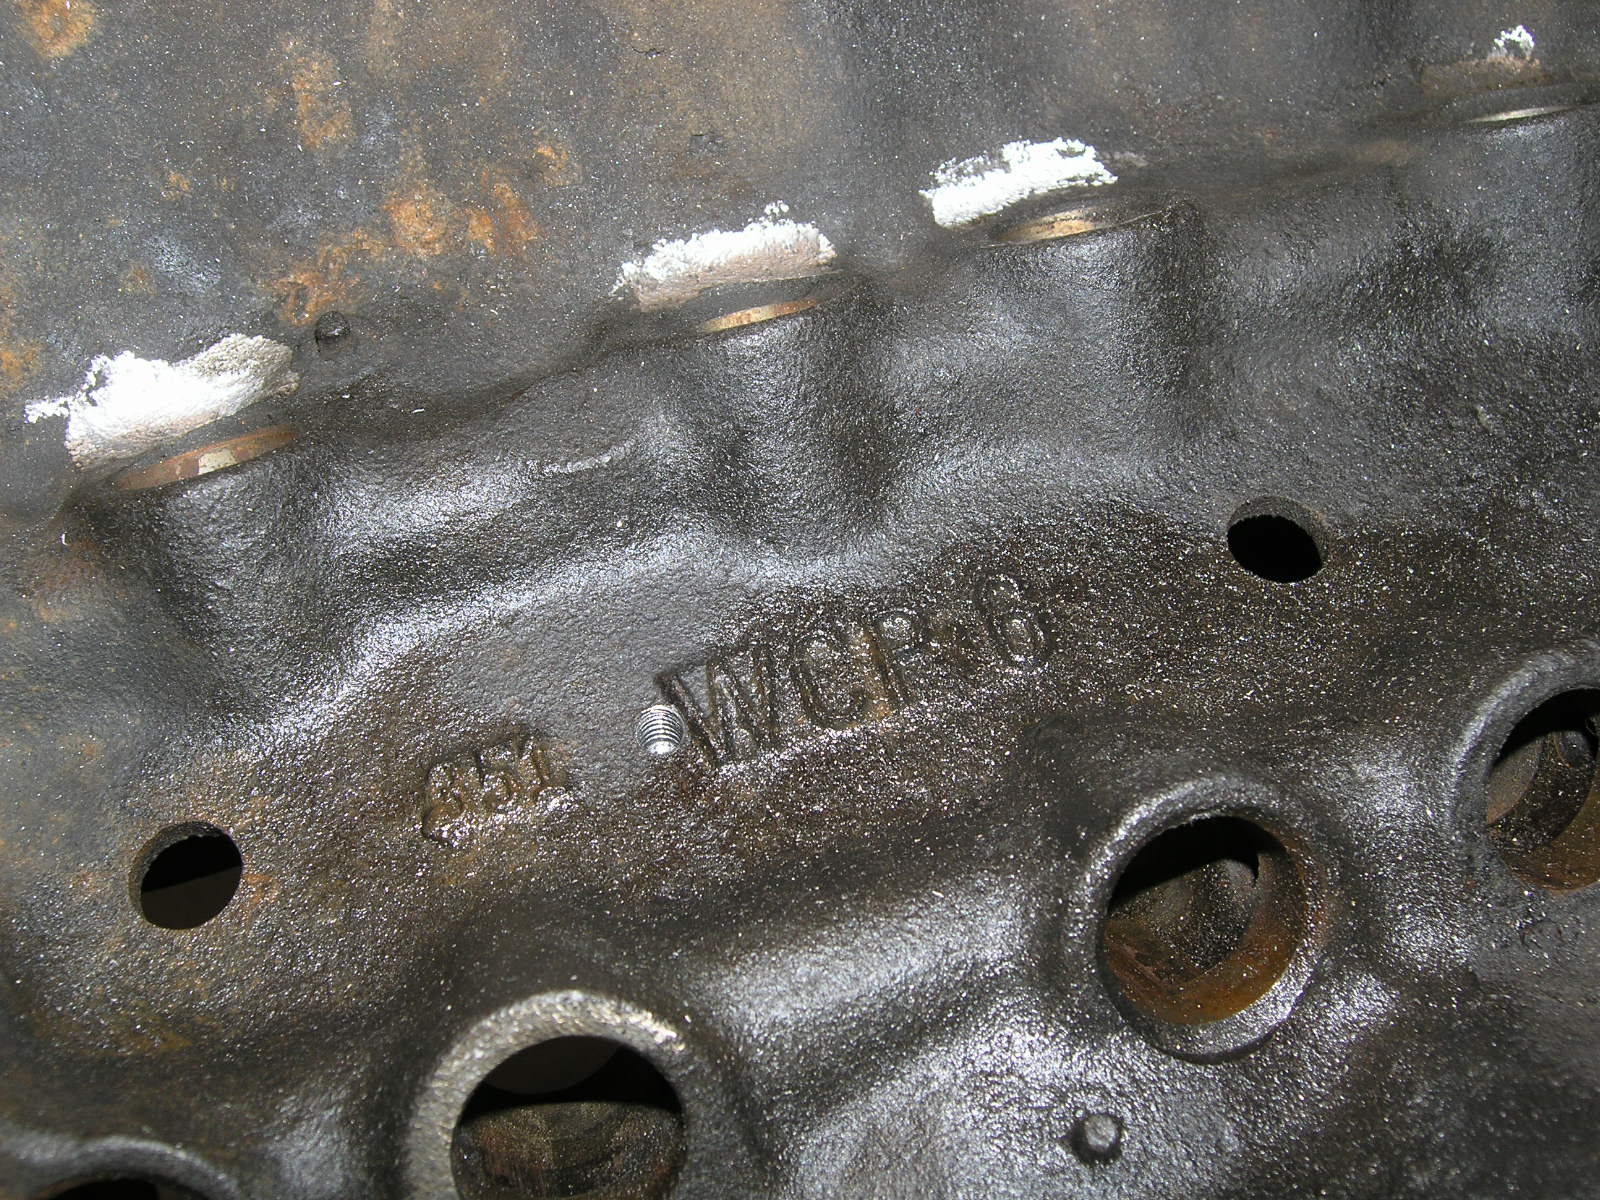
I started the build with a mid-1980’s non-roller 351 W, 2 bolt main, 1 piece rear main seal block. I chose the non-roller block because some of the newer late 80’s/early 90’s roller blocks can have stress cracks in the valley above the cam bearings. The non-roller 351W blocks can be easlly converter to roller blocks and have proved to be crack free.

OLYMPUS DIGITAL CAMERAOLYMPUS DIGITAL CAMERA

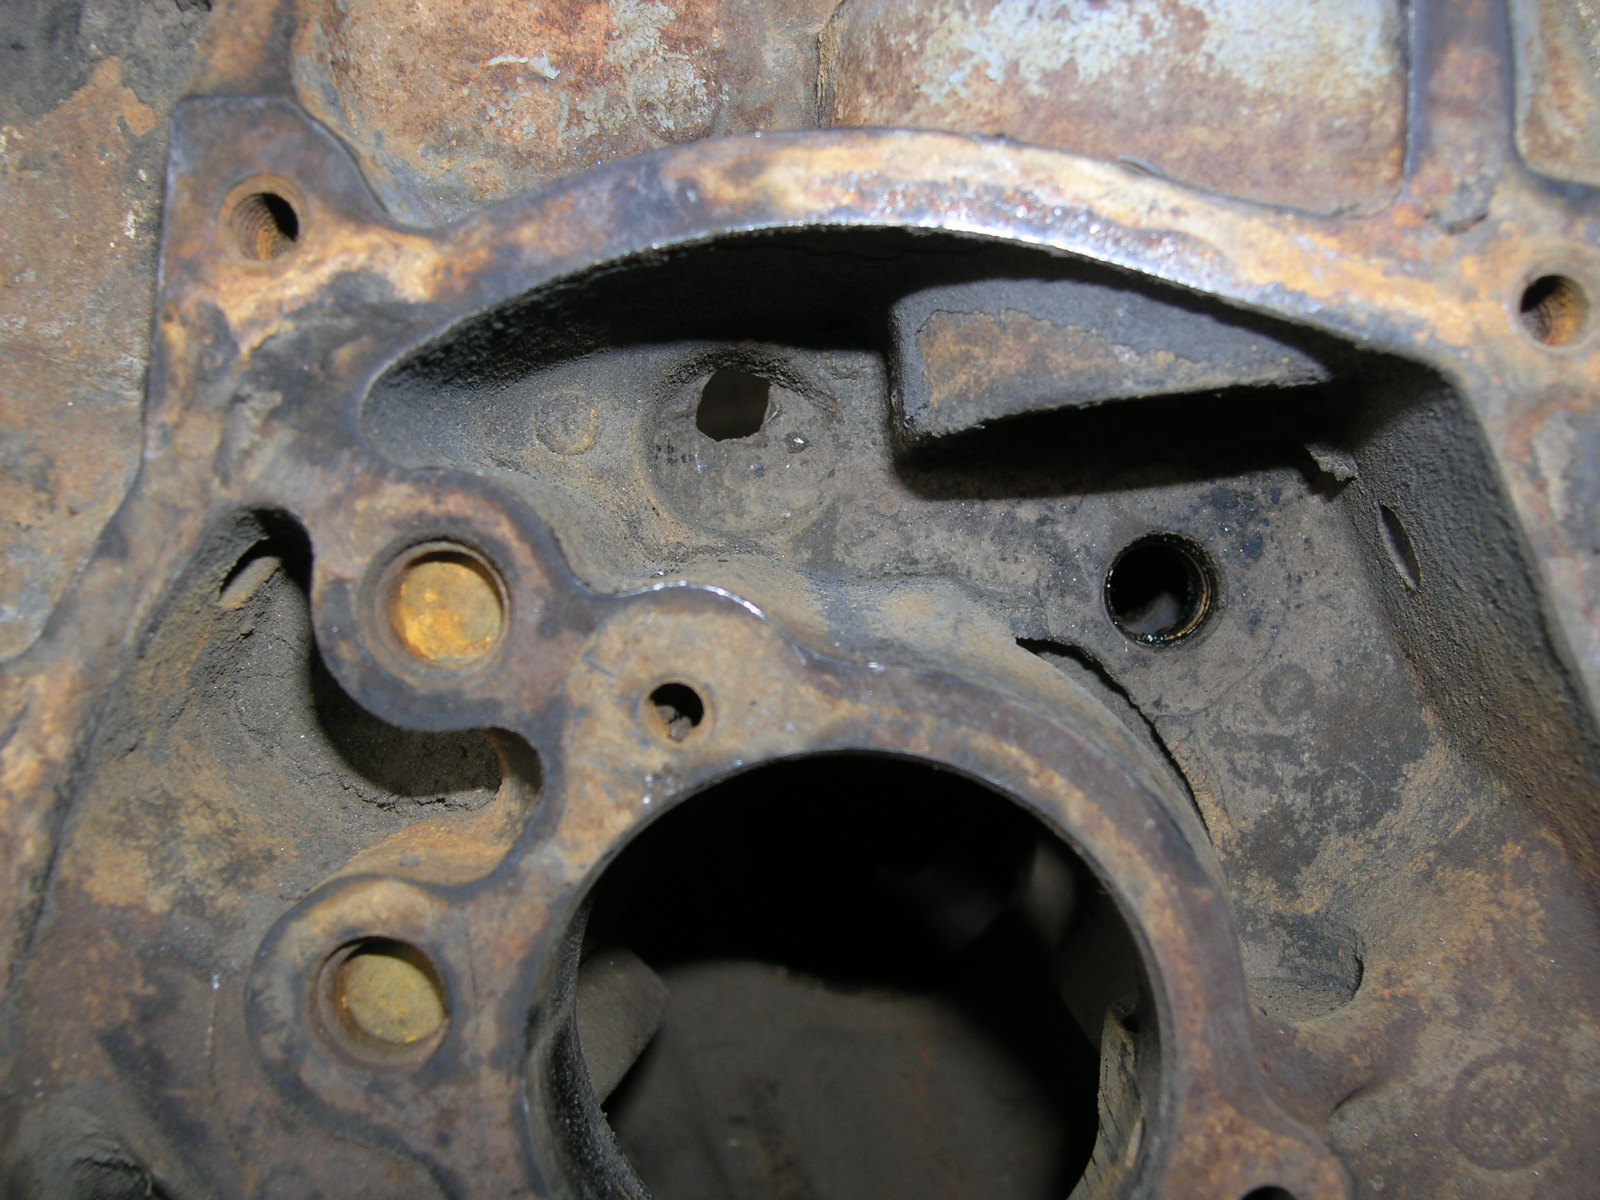
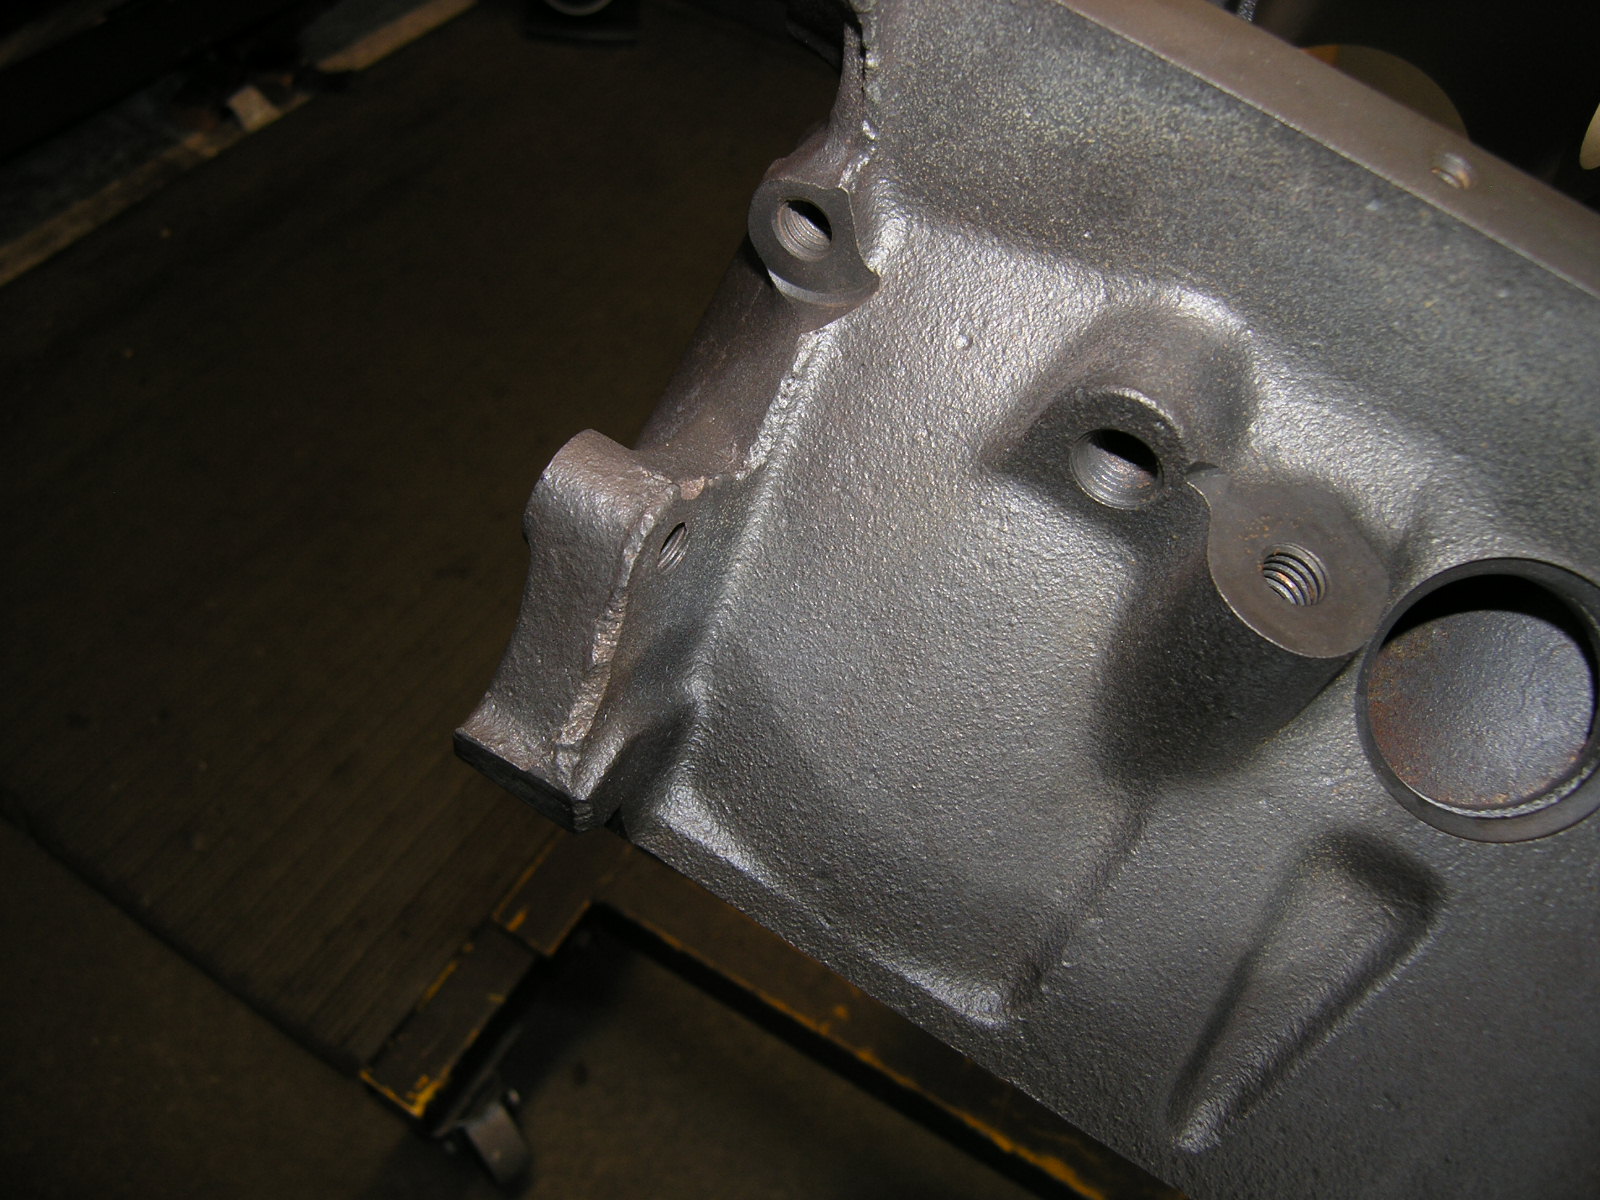
The block recieved the usual hot tank, magniflux, .030 over bore and hone with a torque plate, line hone, and decking.  I also ground off all the extra casting flash and opened up the oil holes in the lifter valley to ensure the oil returns to the oil pan without restriction.

Before – from the factory


OLYMPUS DIGITAL CAMERAOLYMPUS DIGITAL CAMERA

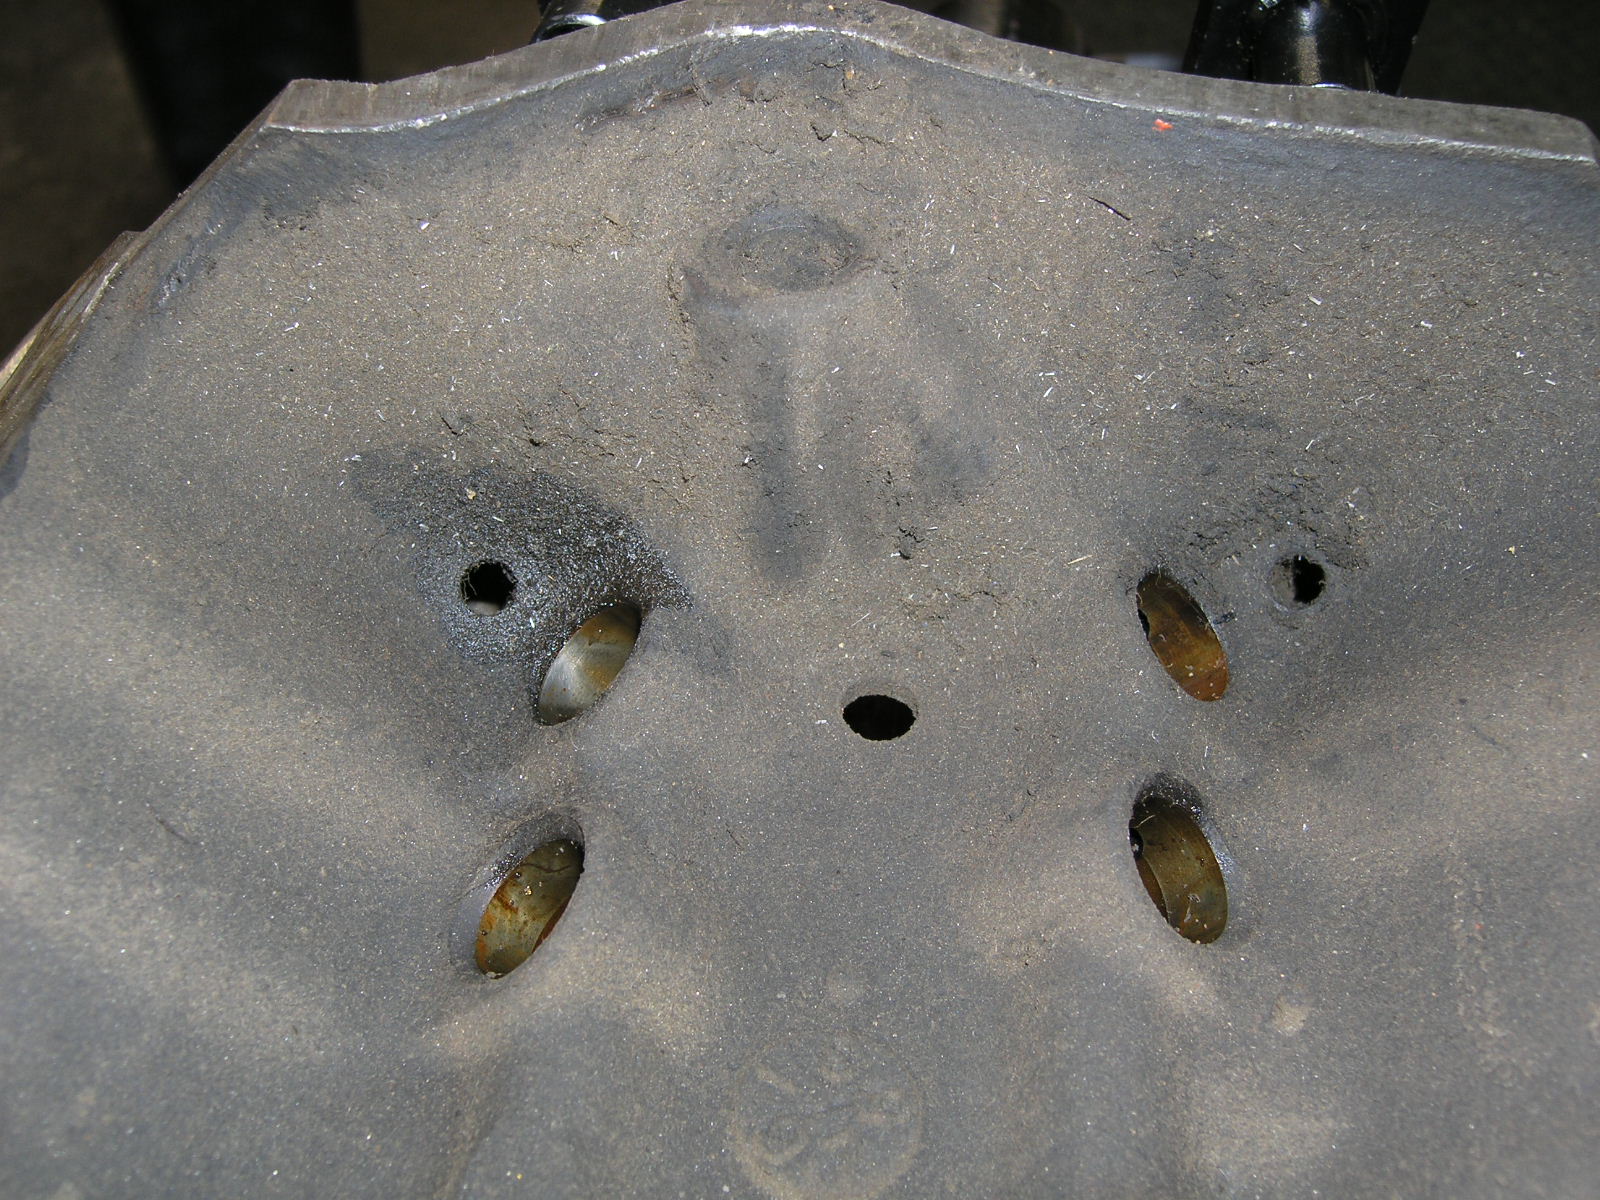
After it has been opened up

OLYMPUS DIGITAL CAMERA OLYMPUS DIGITAL CAMERA

Grinding off the excess casting flash makes the engine easier to work on and helps eliminate stress cracks.

OLYMPUS DIGITAL CAMERA OLYMPUS DIGITAL CAMERA OLYMPUS DIGITAL CAMERA  OLYMPUS DIGITAL CAMERA

Ford 351W (393 Stroker) “Bottom End”

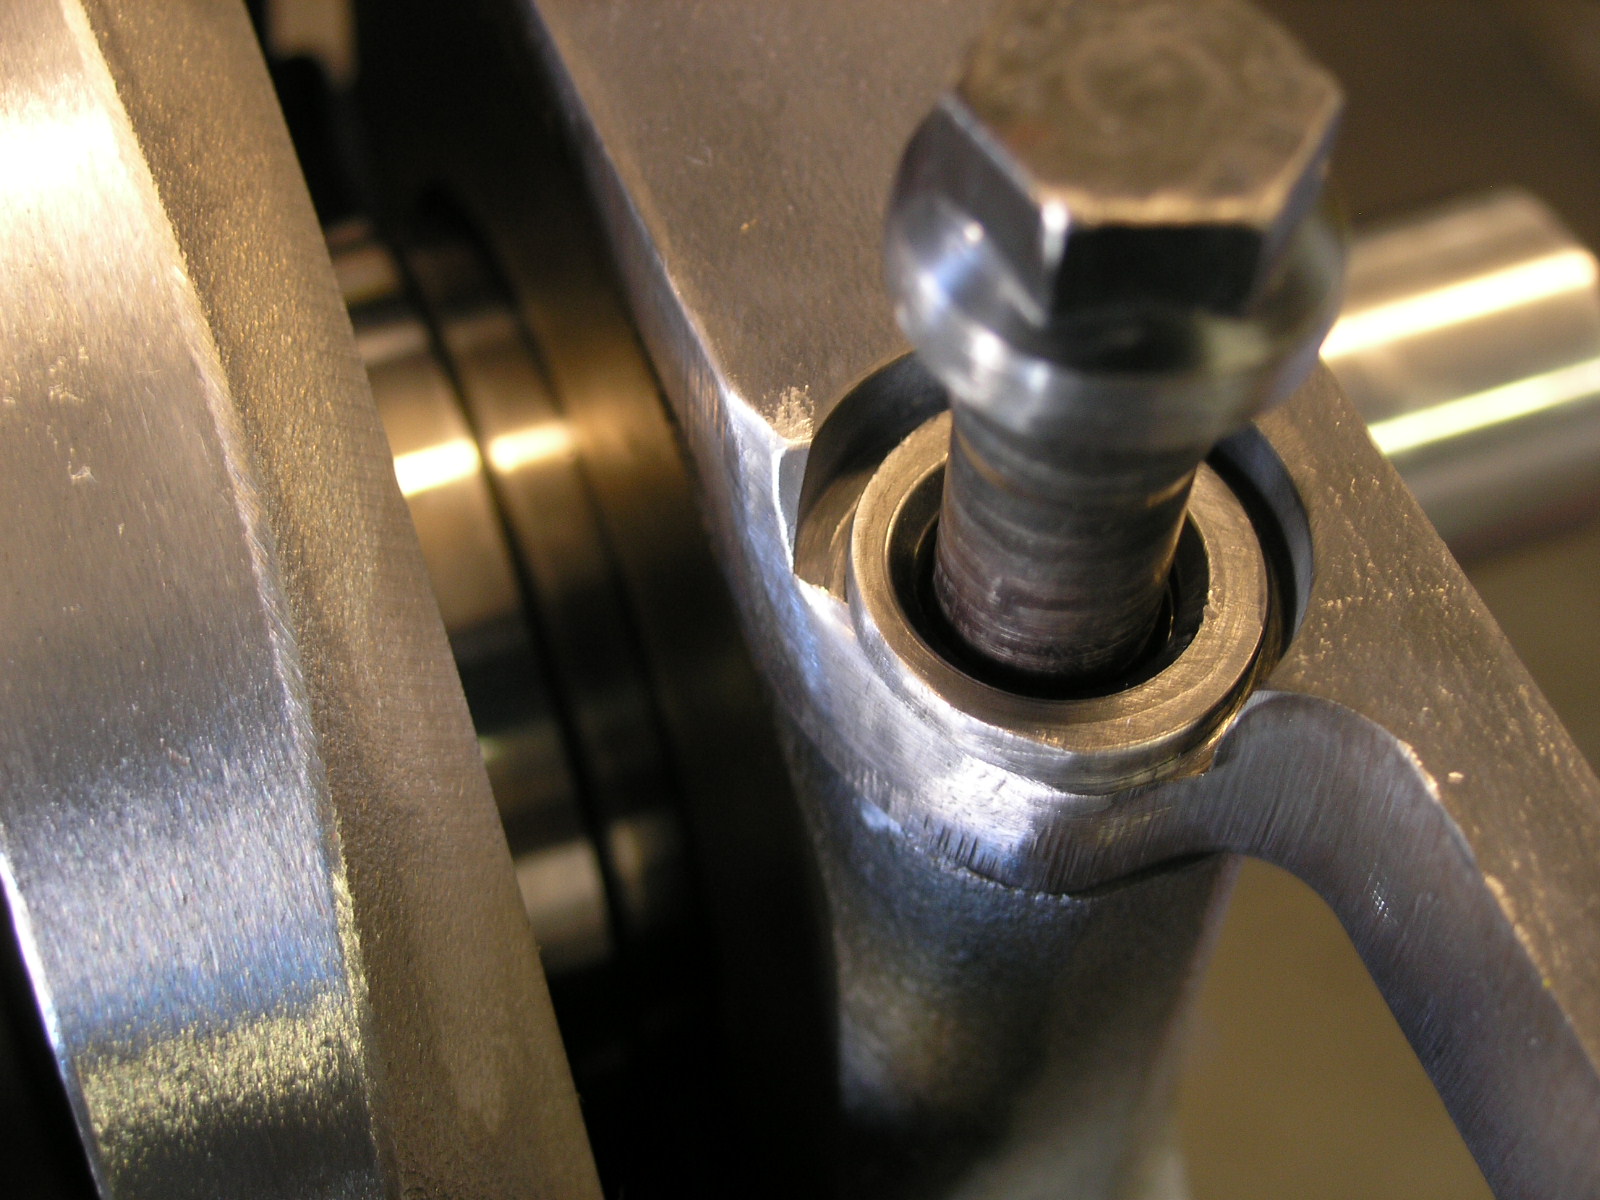
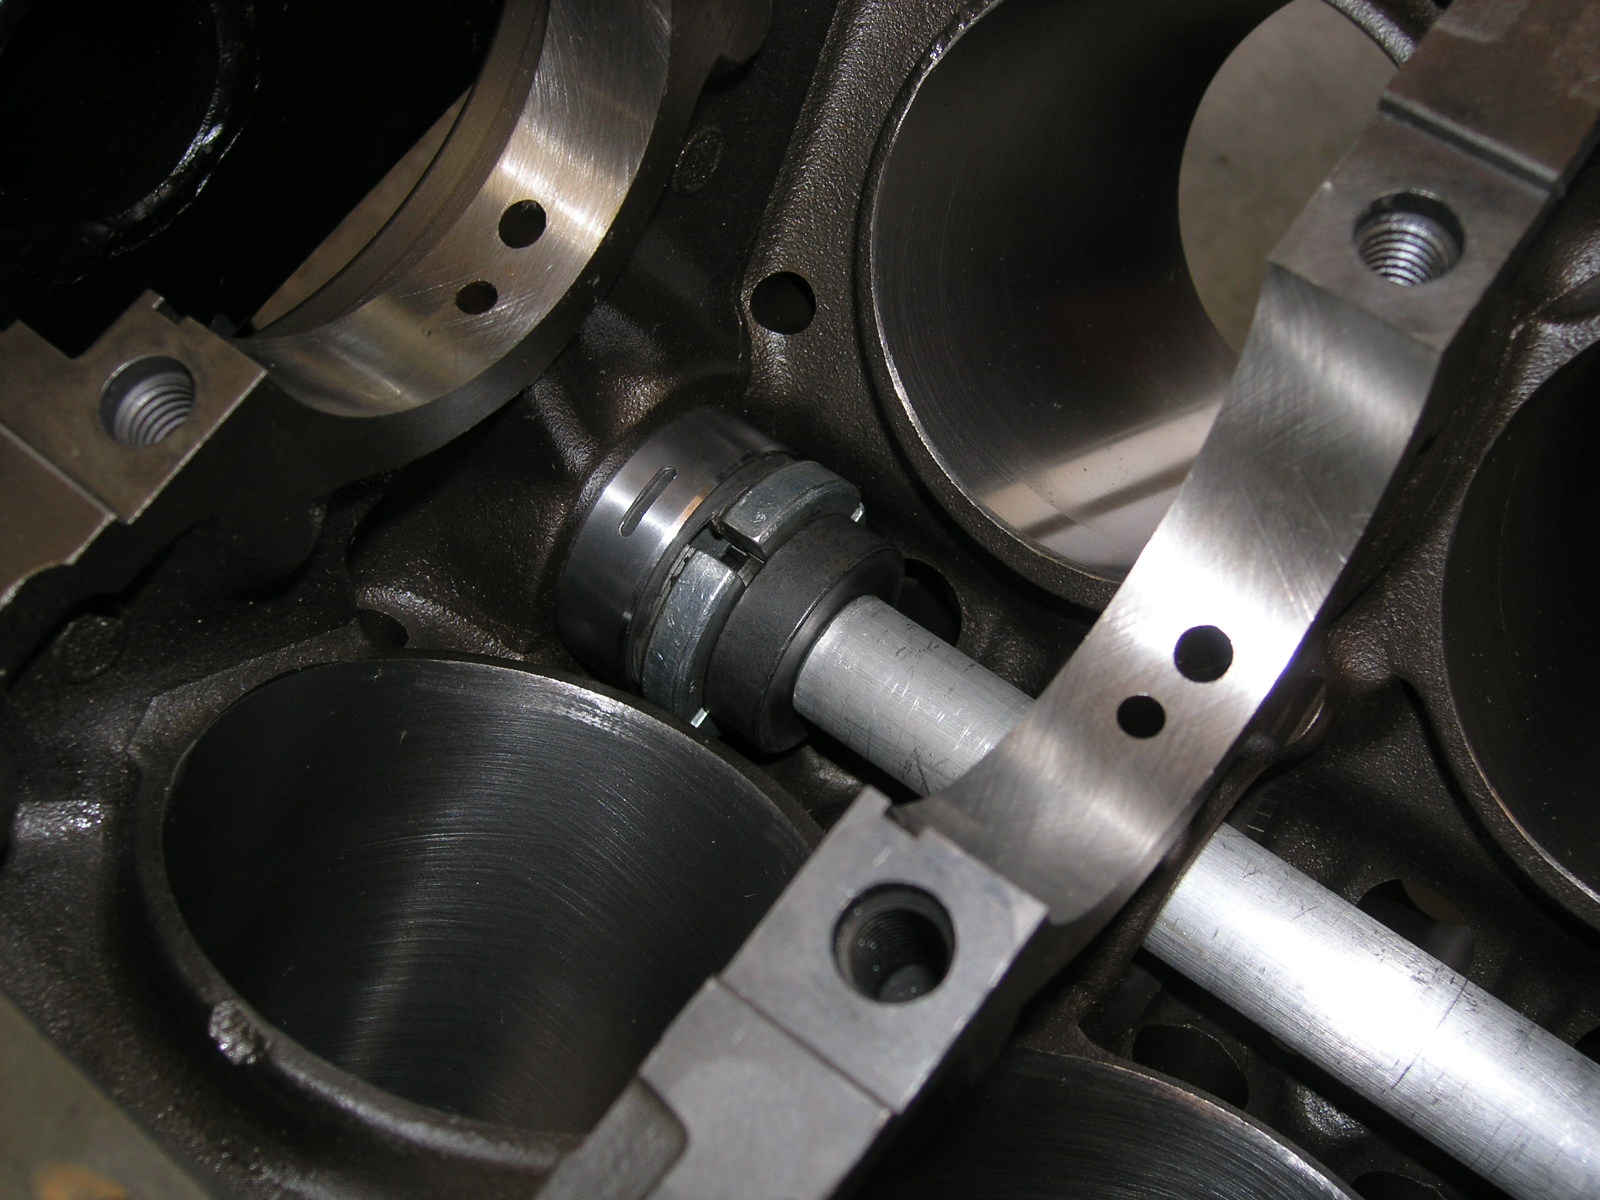
Over 500 Lb-Ft of torque can put quite a strain on the main caps.  A main cap girdle was used along with ARP main cap bolts to ensure everything stayed tight and in-line.

 OLYMPUS DIGITAL CAMERA

Because of the 3.850″ stroke of the crankshaft the main gridle needed to be clearanced. The throw of the crankshaft and the big end of the connecting rods need a minimum of .060 clearance.

OLYMPUS DIGITAL CAMERA OLYMPUS DIGITAL CAMERA

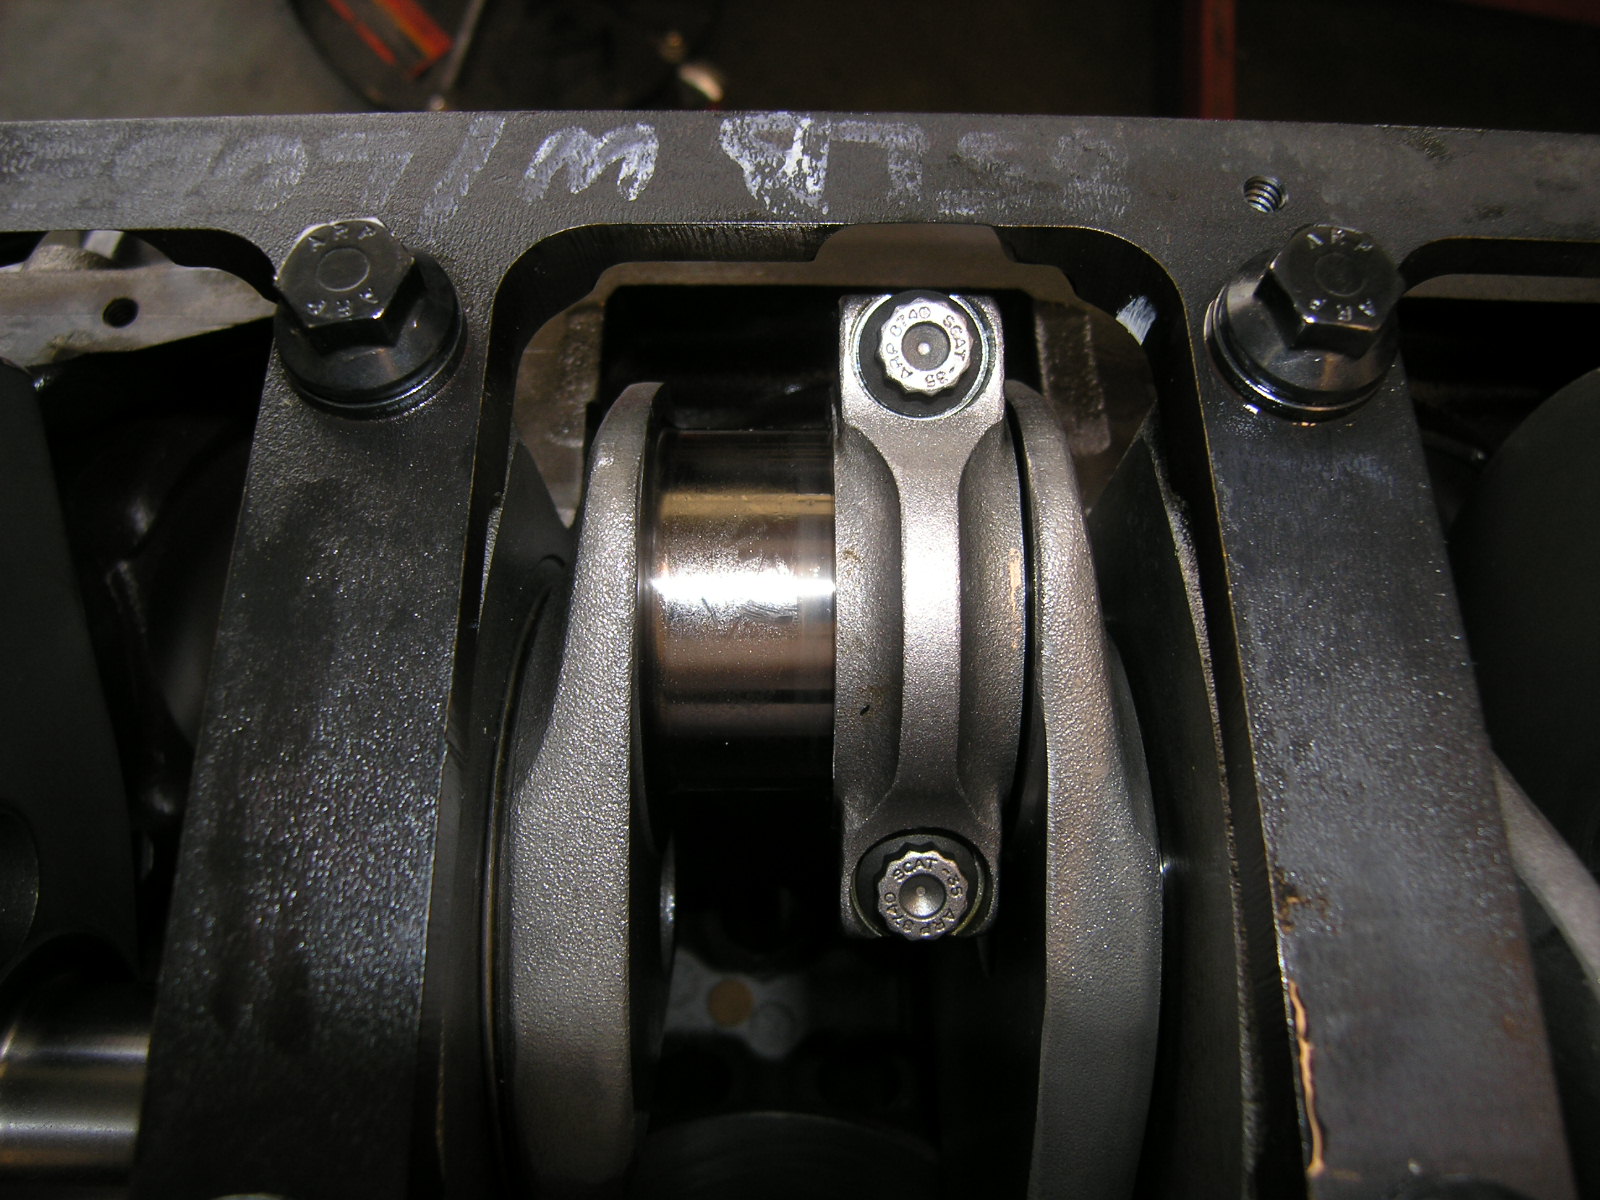
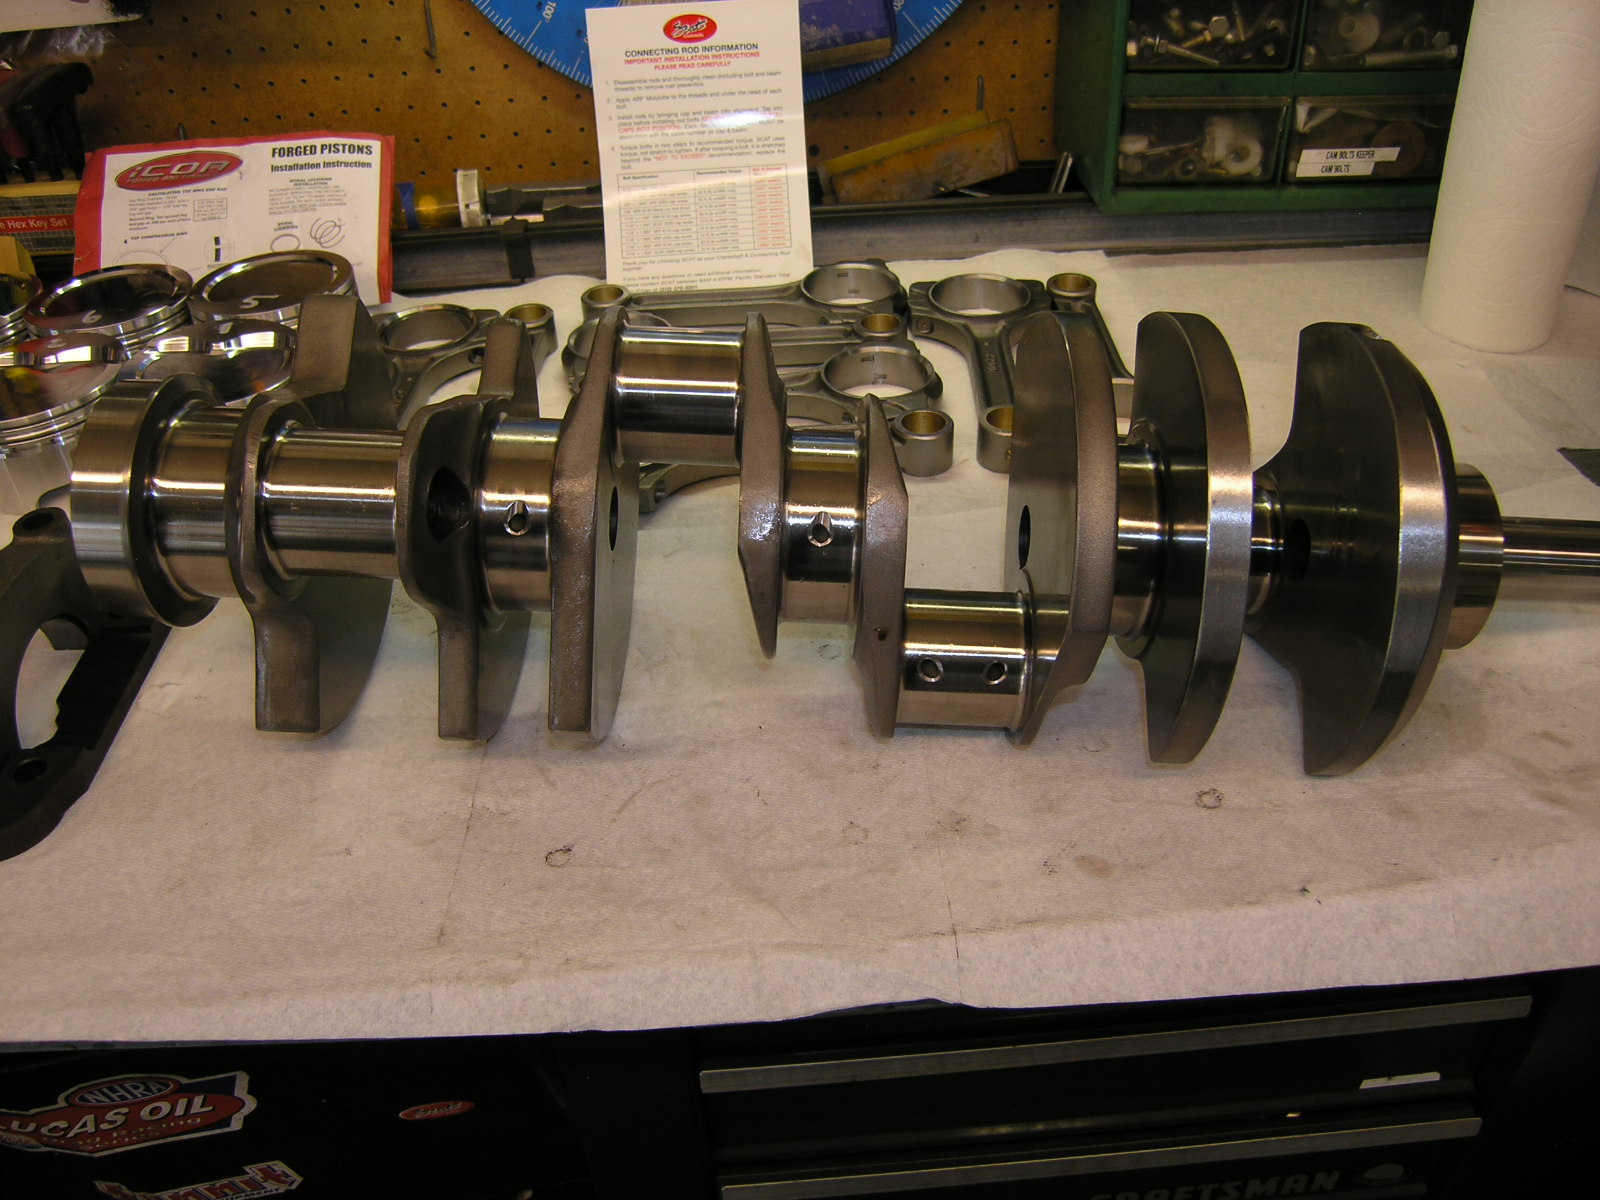
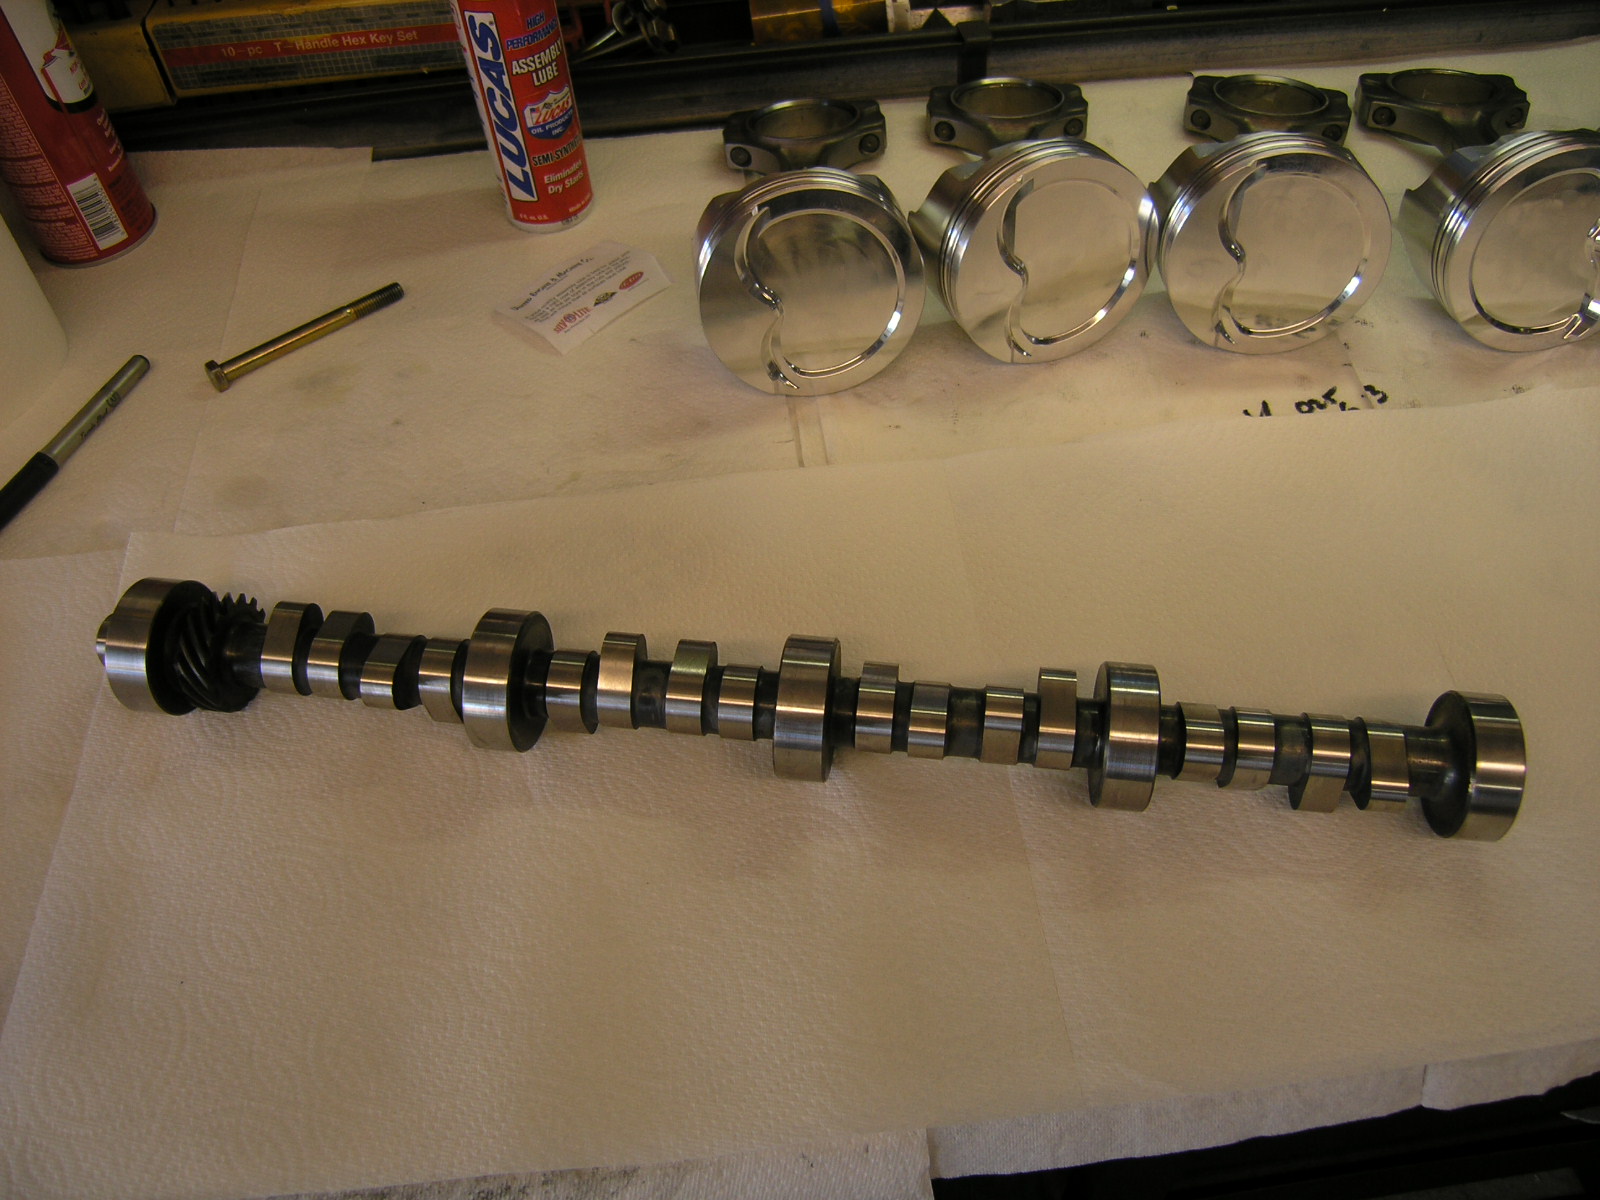
A forged SCAT 3.850″ stroke crankshaft, forged SCAT 6.2″ connecting rods with ARP bolts, forged 4.030″ ICON Pistons, Speed-pro single moly piston rings, and Cleveite bearings were used to complete the bottom end.

 OLYMPUS DIGITAL CAMERAOLYMPUS DIGITAL CAMERA OLYMPUS DIGITAL CAMERA  OLYMPUS DIGITAL CAMERA   OLYMPUS DIGITAL CAMERAOLYMPUS DIGITAL CAMERAOLYMPUS DIGITAL CAMERAOLYMPUS DIGITAL CAMERA

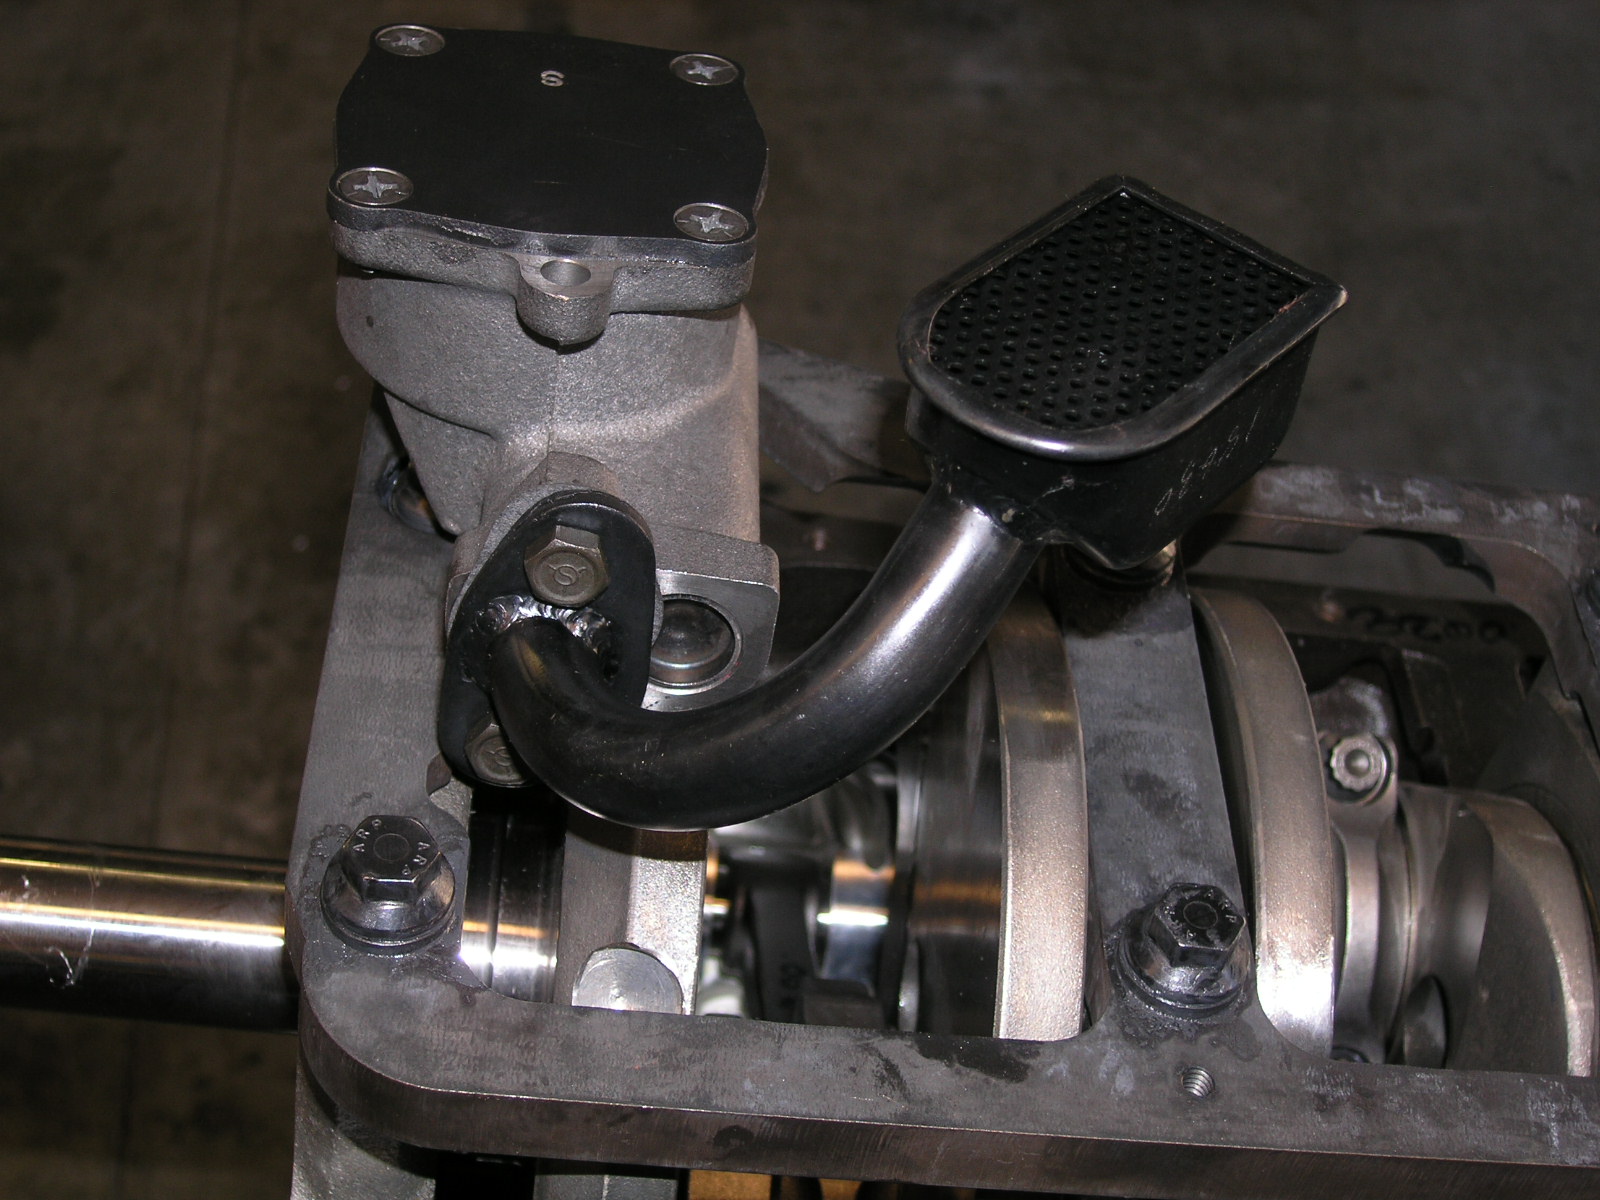
Ford 351W (393 Stroker) “Oiling System”

A mellings high volume oil pump was used to keep the bottom end well lubed. The main gridle needed to be clearanced to ensure a proper fit between it and the oil pump. To keep the integrity of the oil pump it’s better to grind the main gridle not the oil pump.

OLYMPUS DIGITAL CAMERA OLYMPUS DIGITAL CAMERA OLYMPUS DIGITAL CAMERA OLYMPUS DIGITAL CAMERA

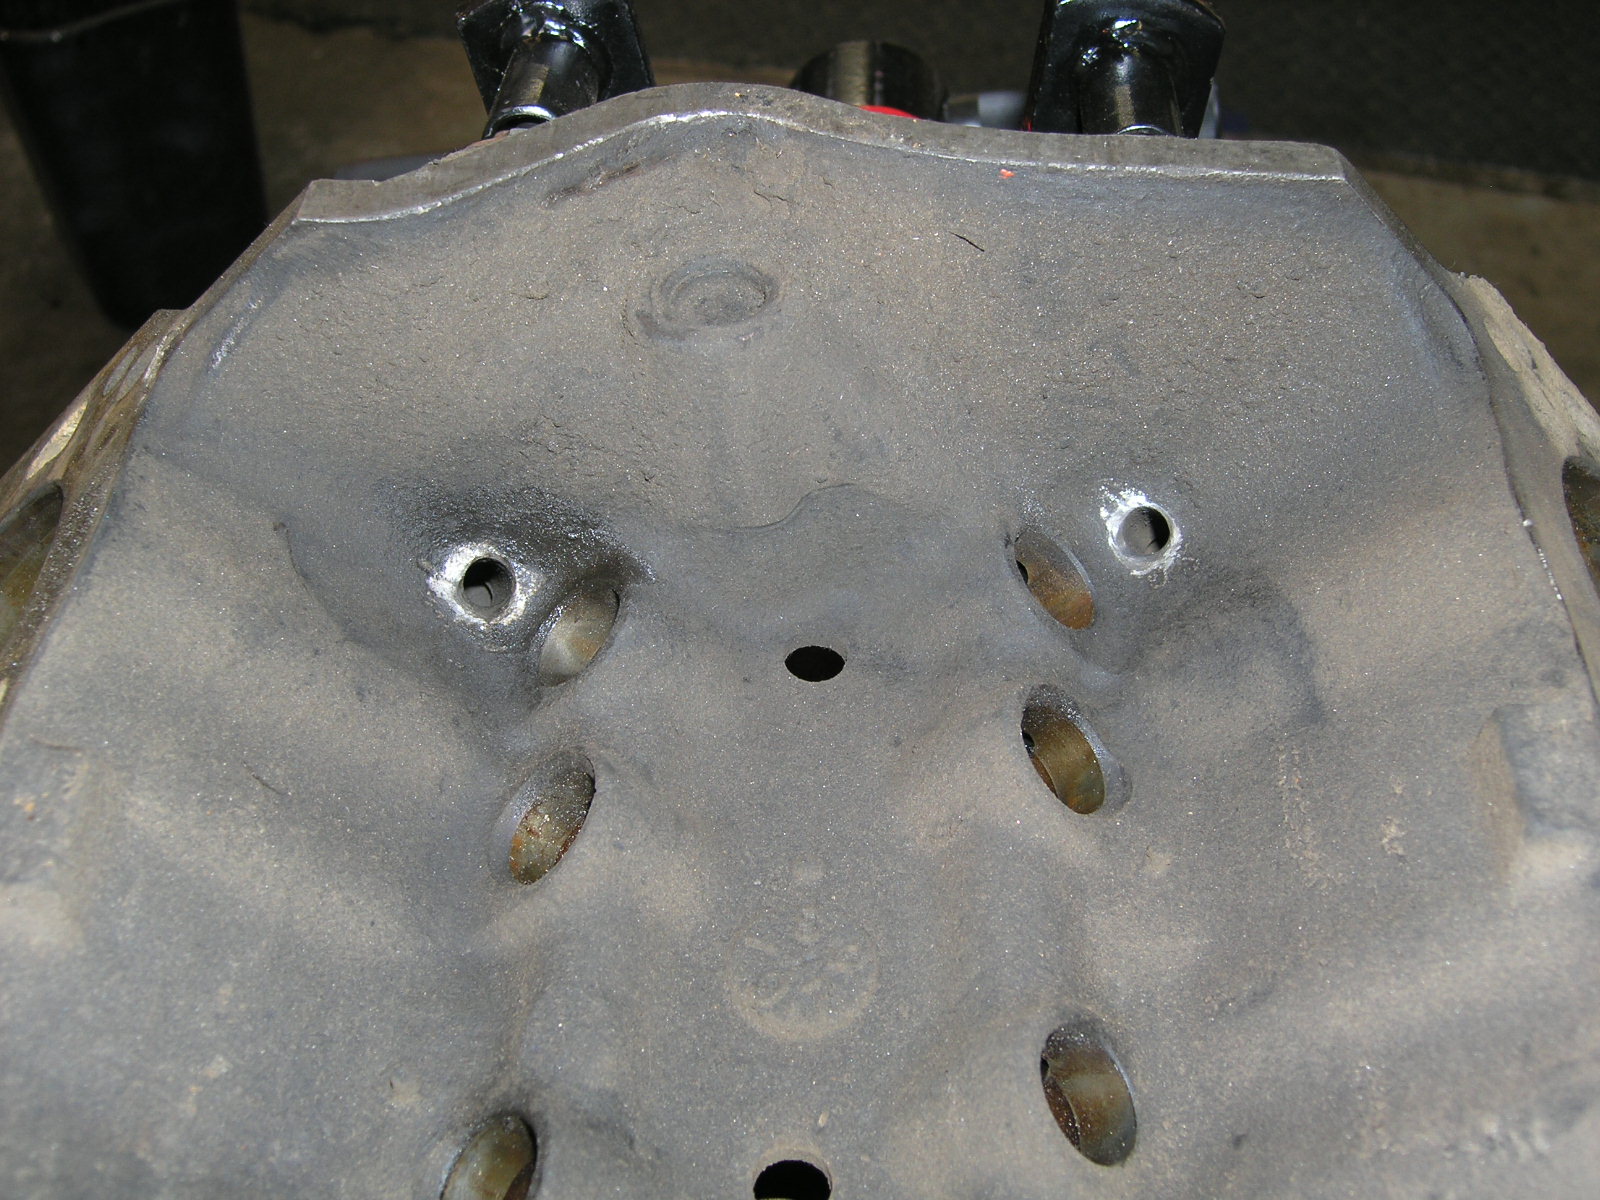
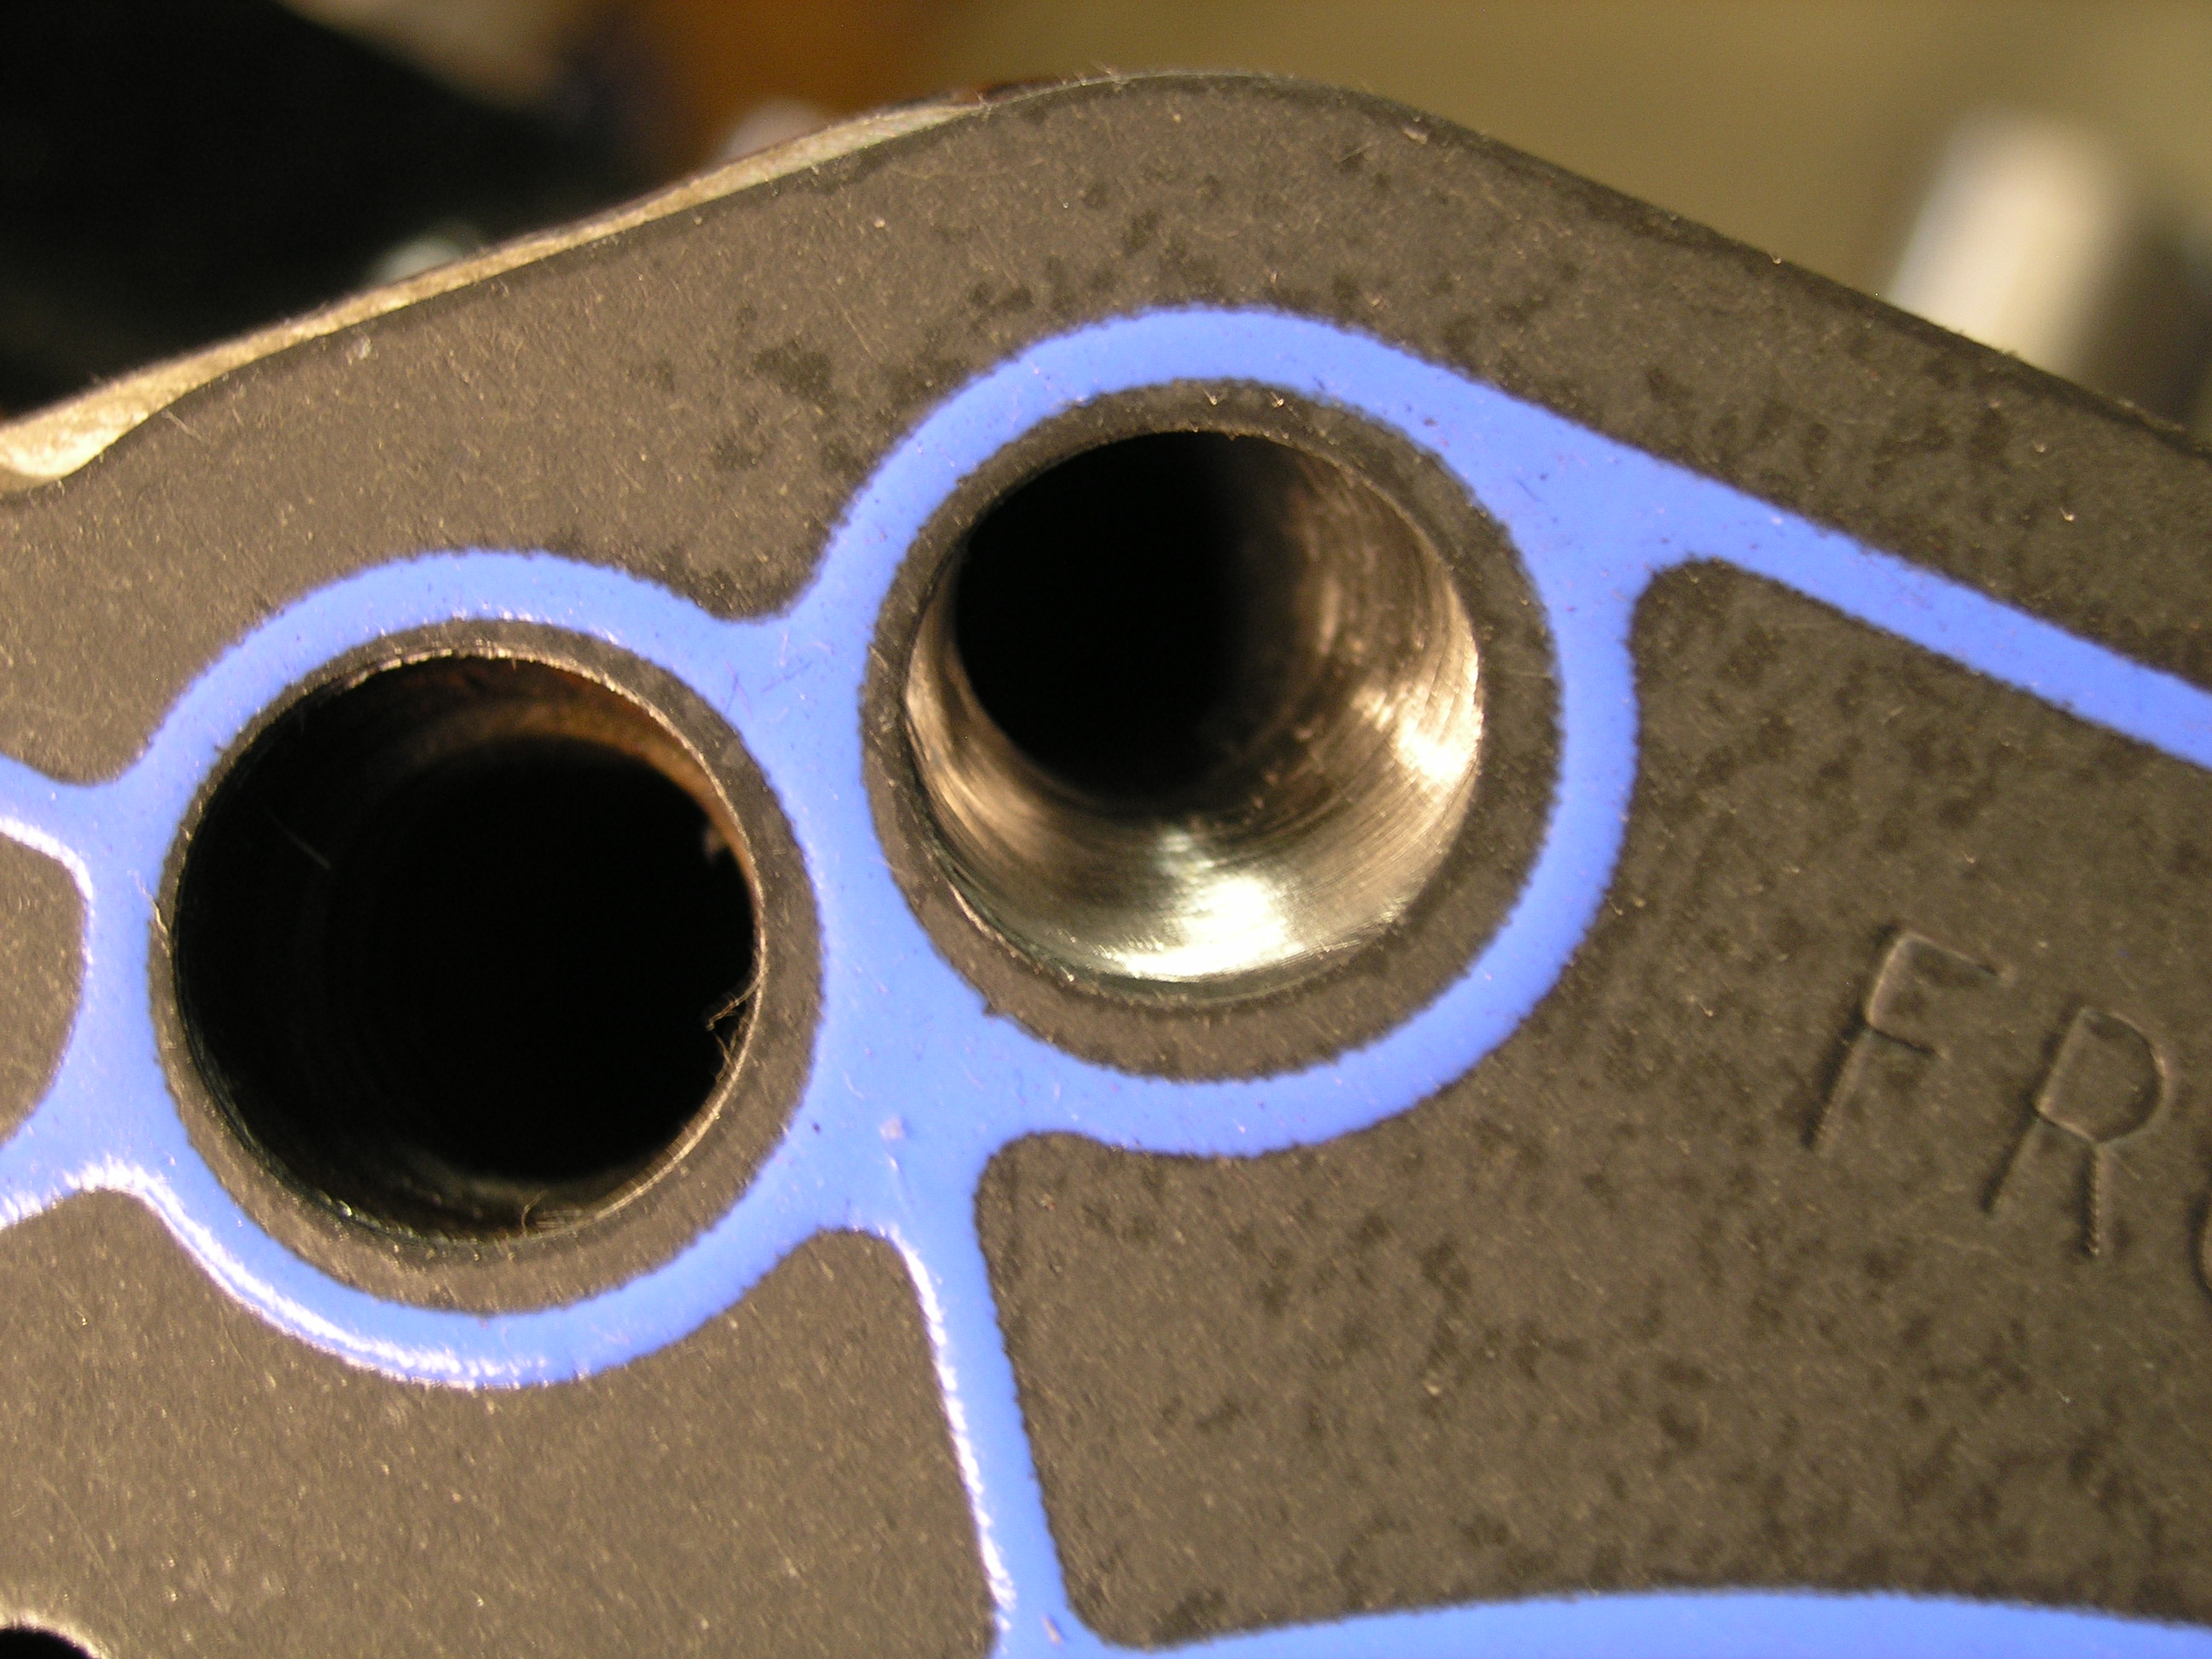
From the factory the oil holes that drain from the cylinder heads back to the oil pan can sometimes be mis-aligned. To ensure oil flows freely the holes were opened up and chamfered.

OLYMPUS DIGITAL CAMERA OLYMPUS DIGITAL CAMERAOLYMPUS DIGITAL CAMERA

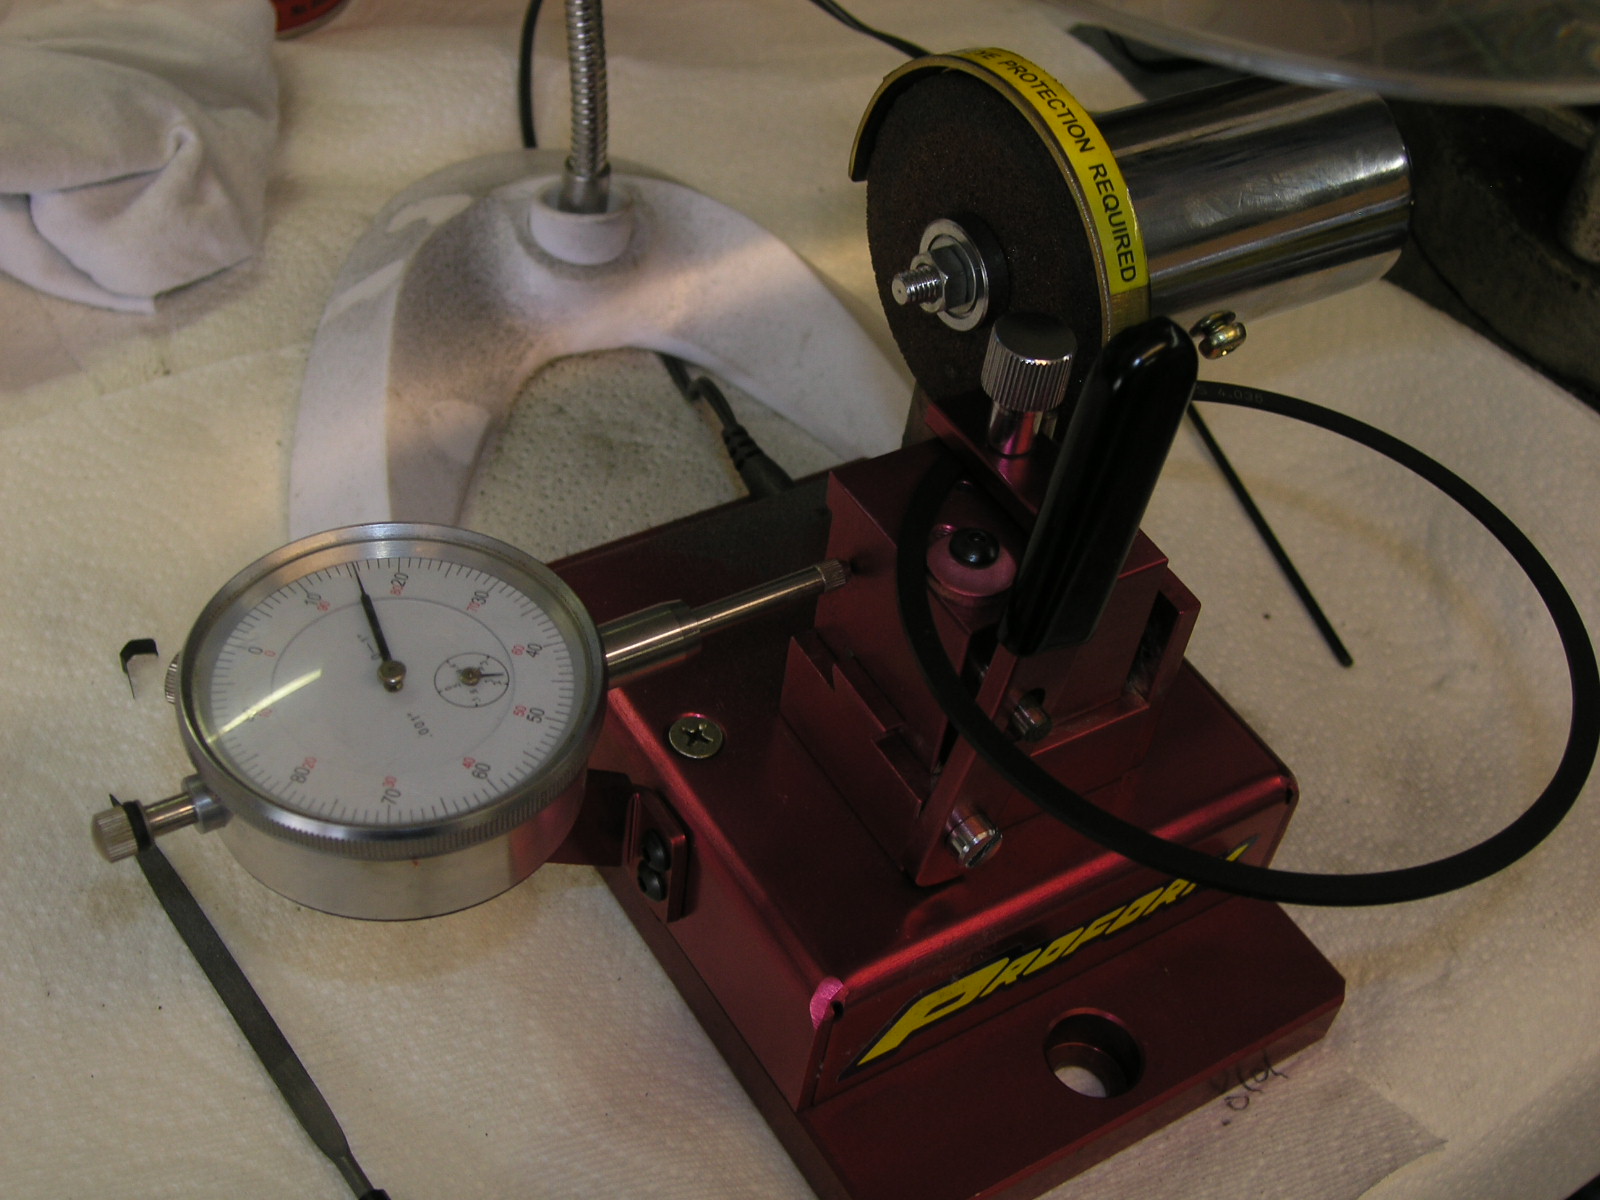
With all JMac Performance engine builds the oil pump is disassembled to ensure all clearances are correct and to verify the relief valve and  pressure spring work freely.

OLYMPUS DIGITAL CAMERA

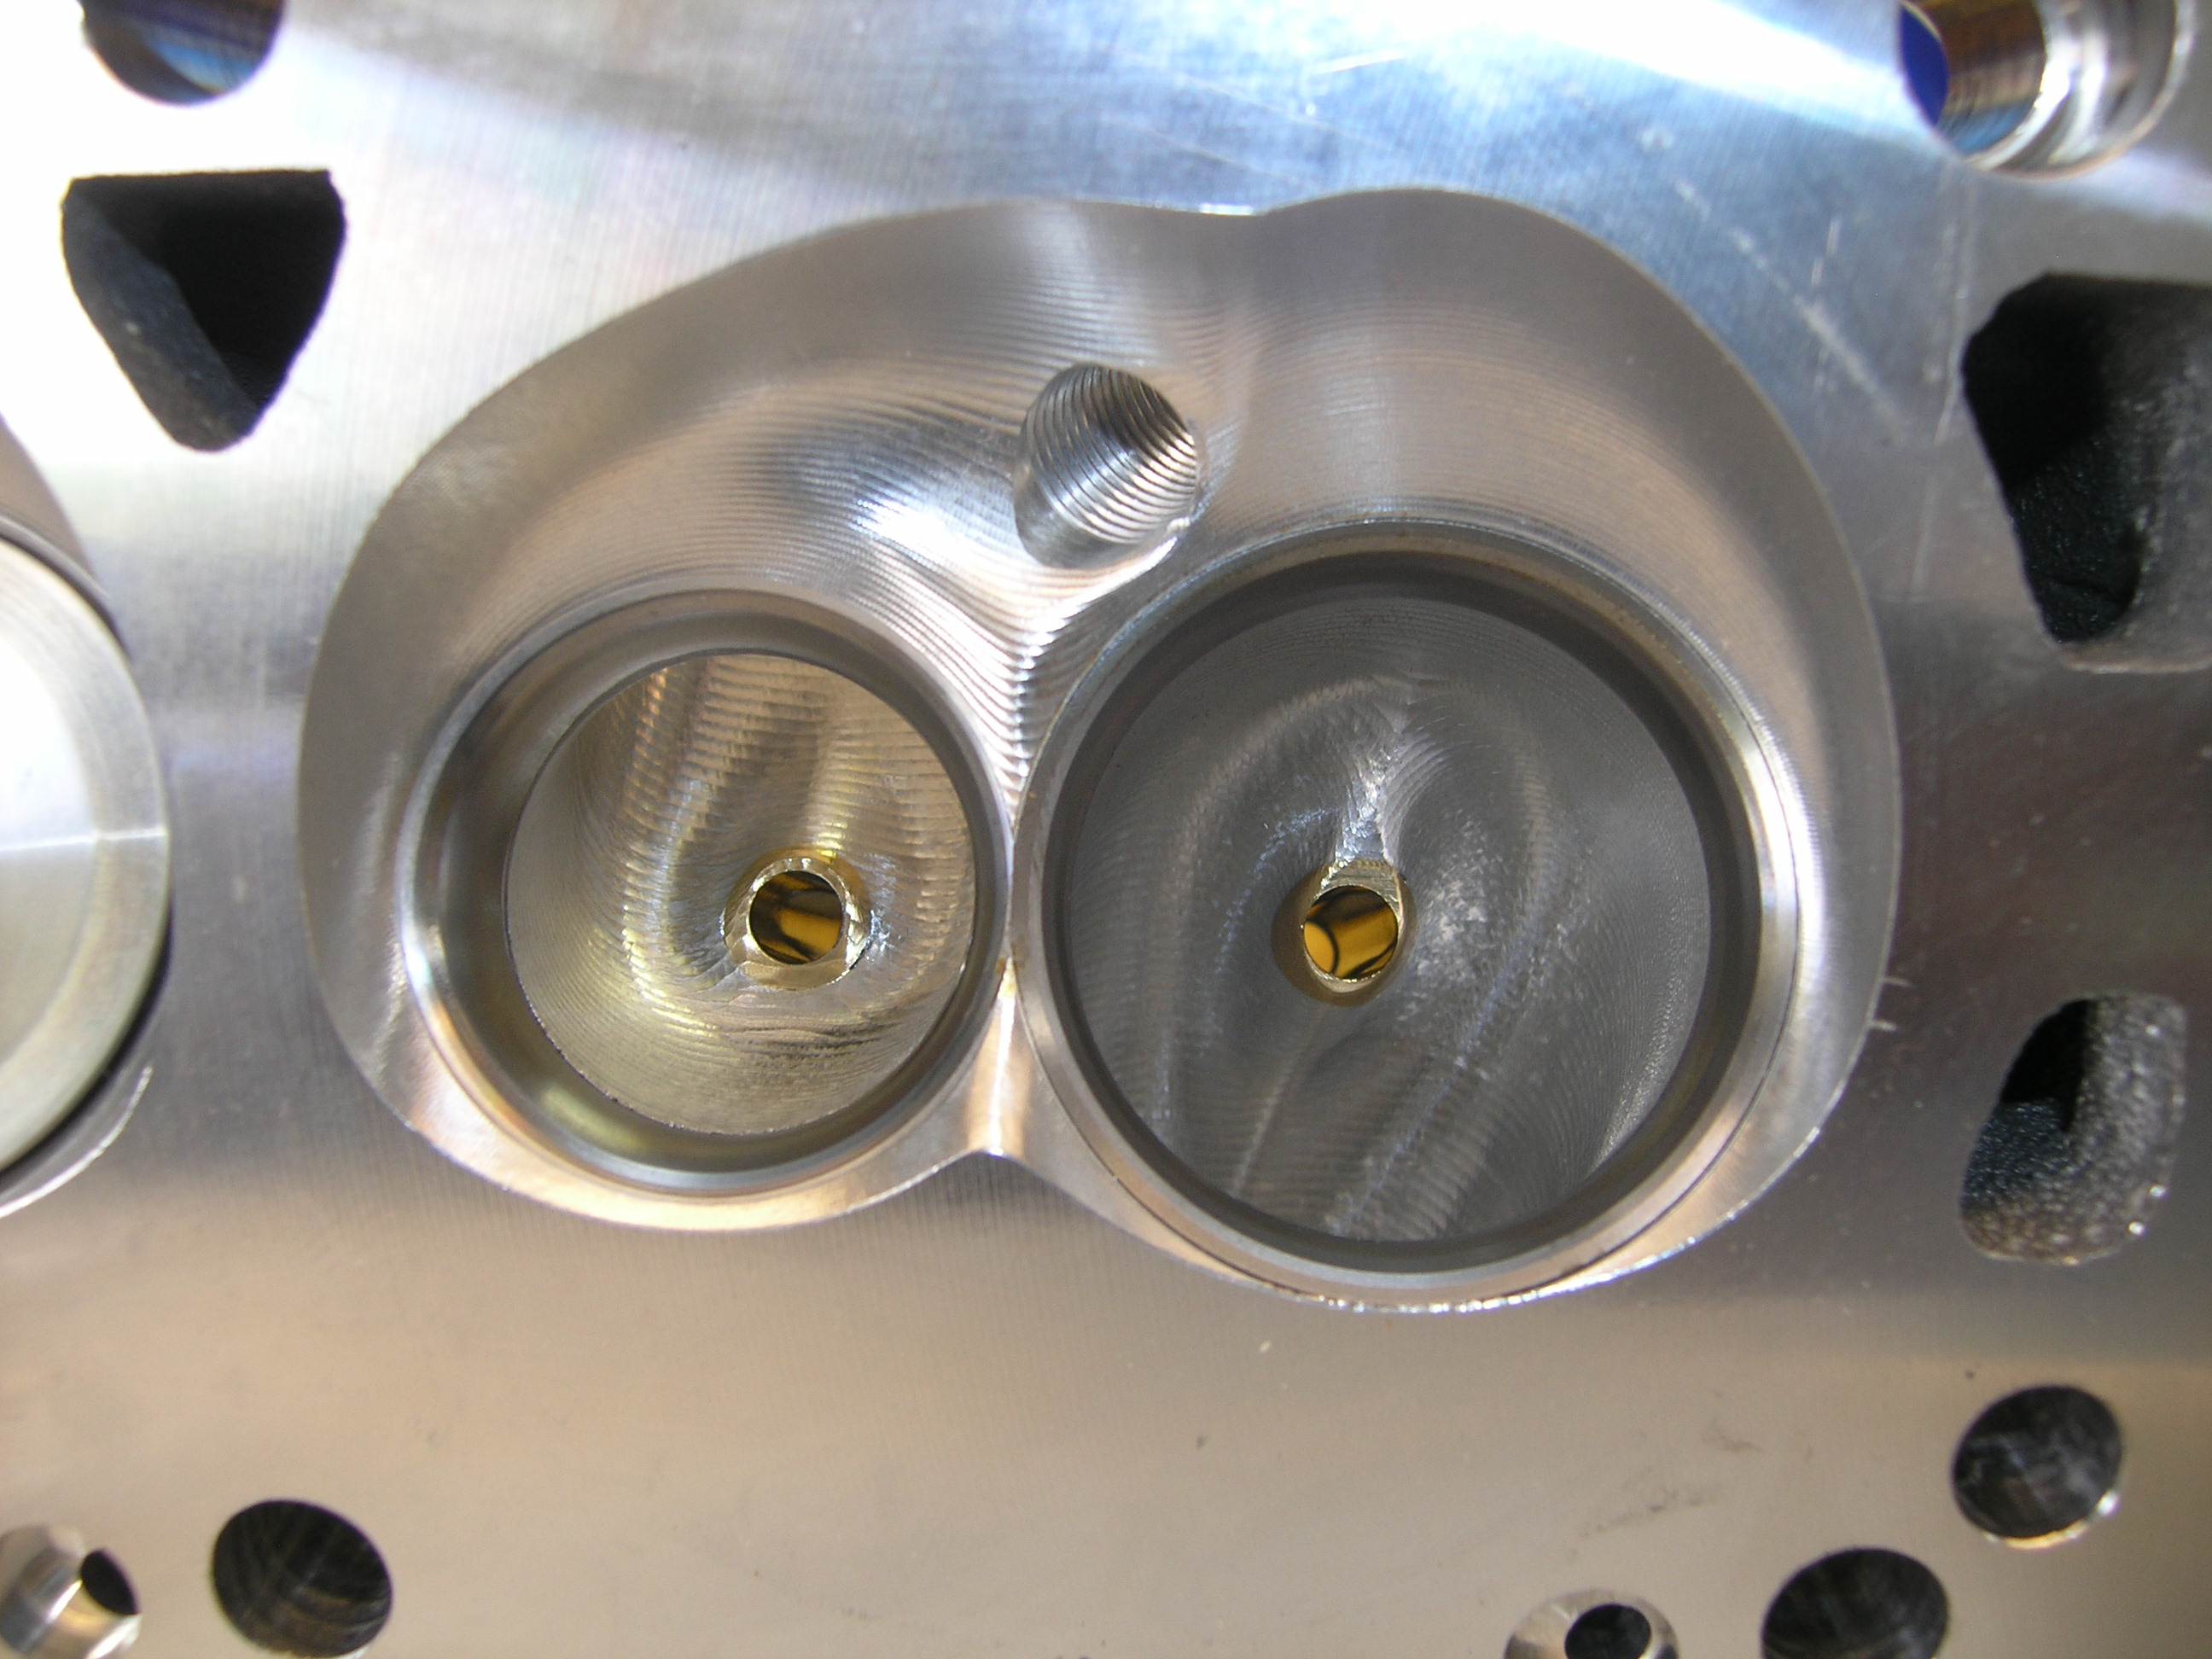
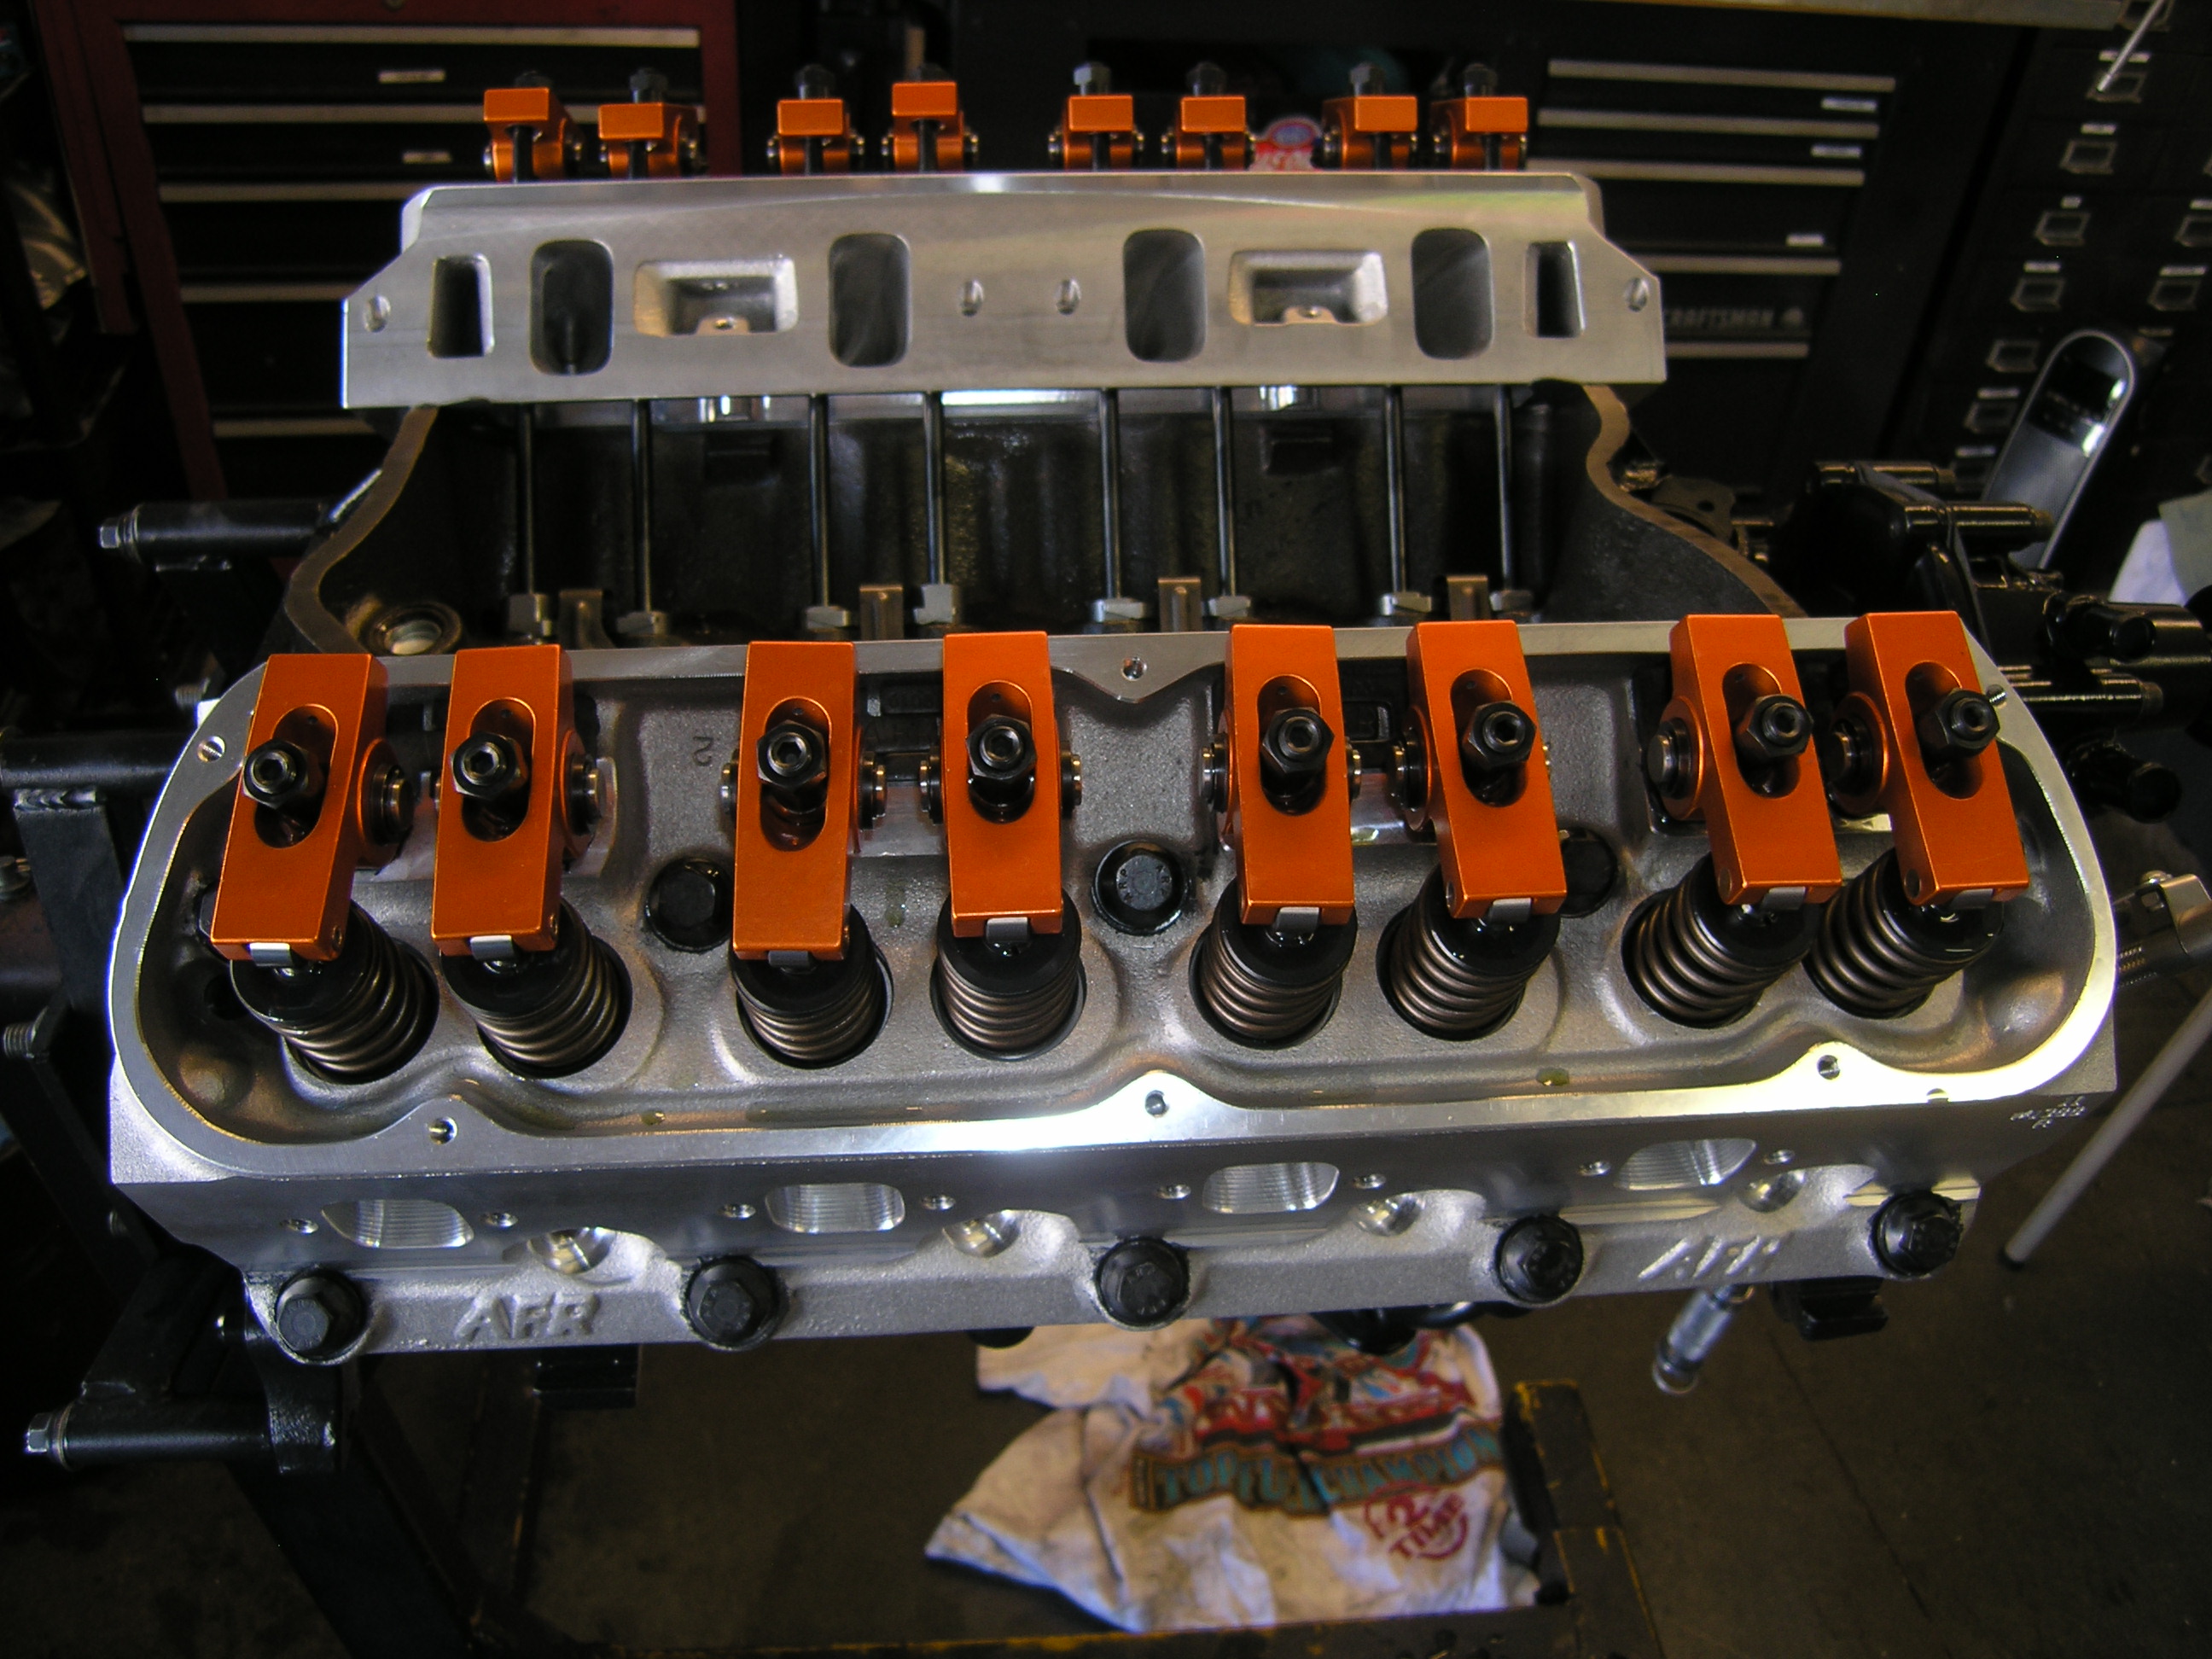
Ford 351W (393 Stroker) “Cylinder Heads and Induction System”

AFR Renegade 185 cc heads were used, they are CNC ported and are an exceptional cylinder head. A larger cylinder head would have made more horsepower, However the customer stressed they wanted low RPM torque over higher RPM horsepower. The smaller cylinder heads help increase the intake velocity at lower RPM thus creating a more responsive and higher torque engine.

OLYMPUS DIGITAL CAMERA OLYMPUS DIGITAL CAMERA OLYMPUS DIGITAL CAMERA OLYMPUS DIGITAL CAMERA OLYMPUS DIGITAL CAMERAOLYMPUS DIGITAL CAMERA

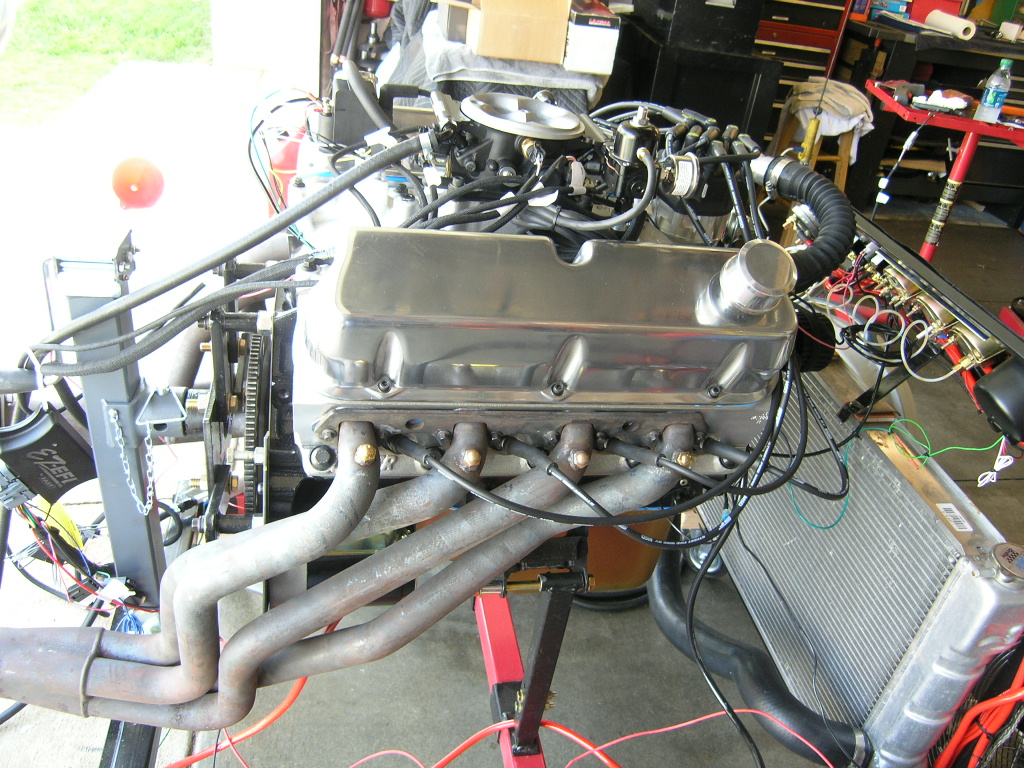
Because the customer wanted a maintenance free fuel system with maximum drivability the FAST EZ fuel injection system was used.  It is a self learning, extremely easy system to install and use and no tuning is needed!

OLYMPUS DIGITAL CAMERA OLYMPUS DIGITAL CAMERA

I used an Edelbrock RPM Performer dual plane intake manifold. It matched the operating RPM of the engine very well, from 2500 – 6500 RPM. I have found that most fuel injection systems do not like full dual plane intake manifolds. So, about 1/2″ was removed from the intake manifolds center divider to help both banks equalize better.

Before                                                                                            After

OLYMPUS DIGITAL CAMERA OLYMPUS DIGITAL CAMERA

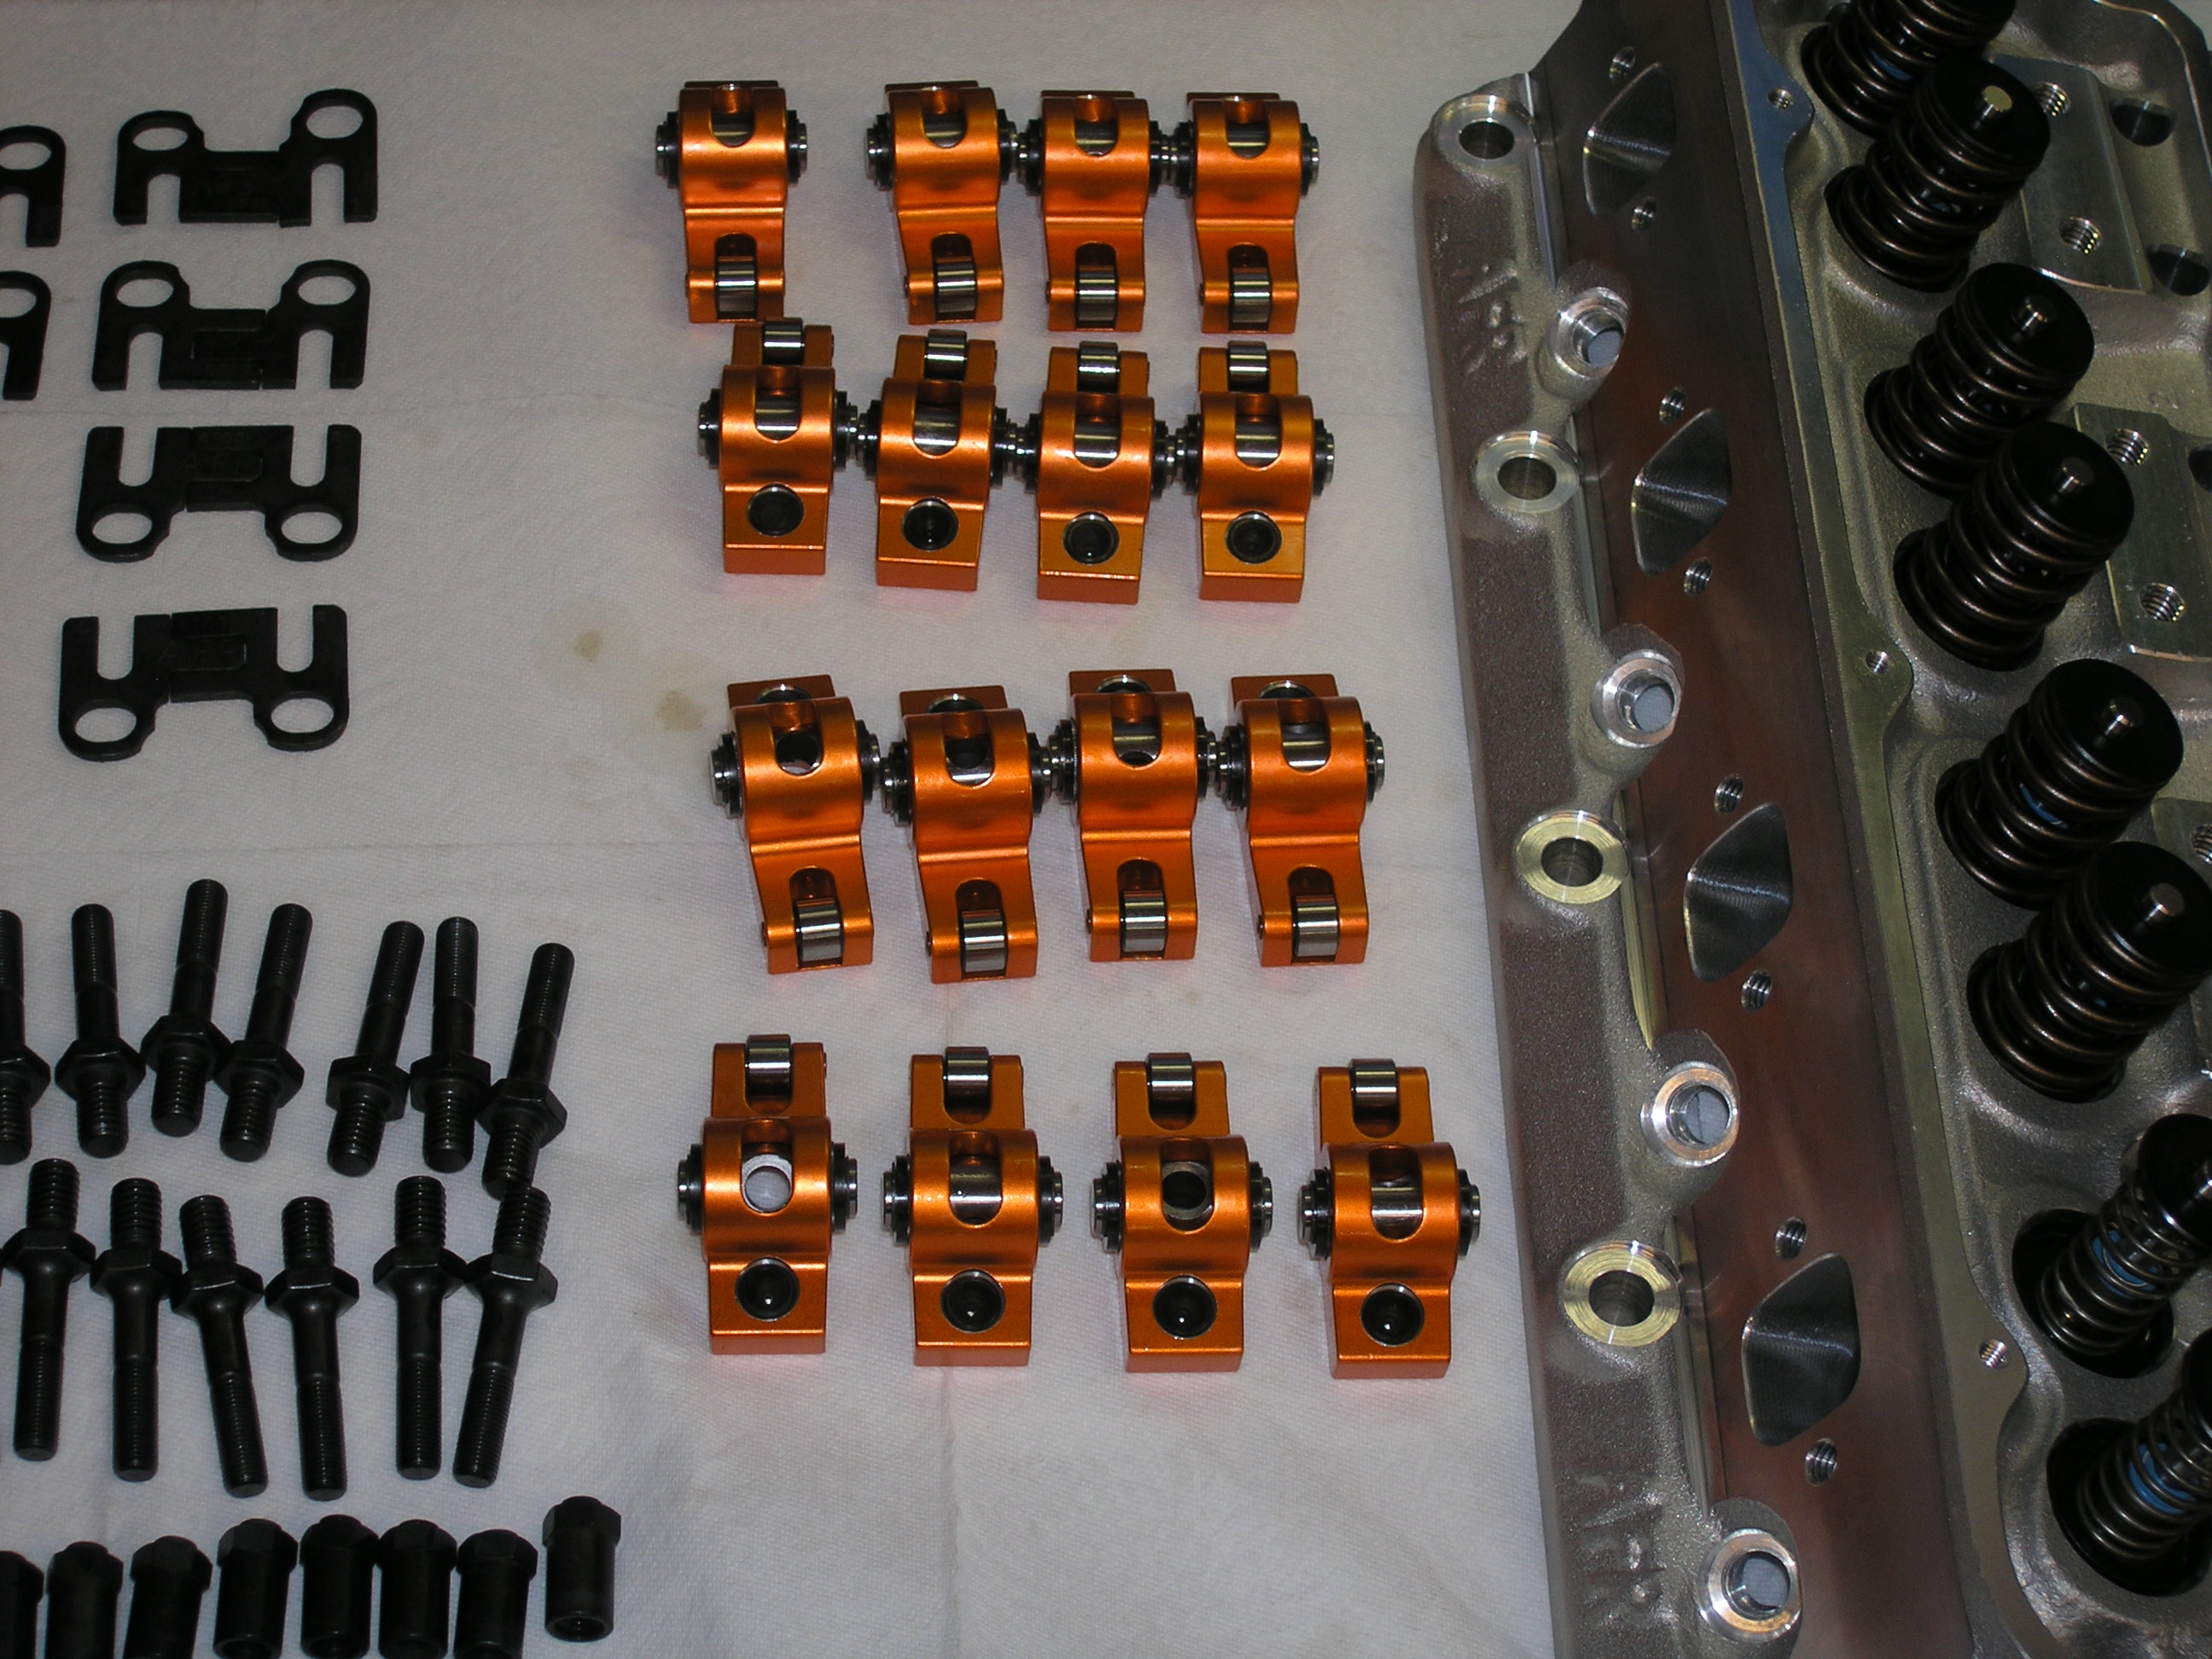
Ford 351W (393 Stroker) “Valve Train”

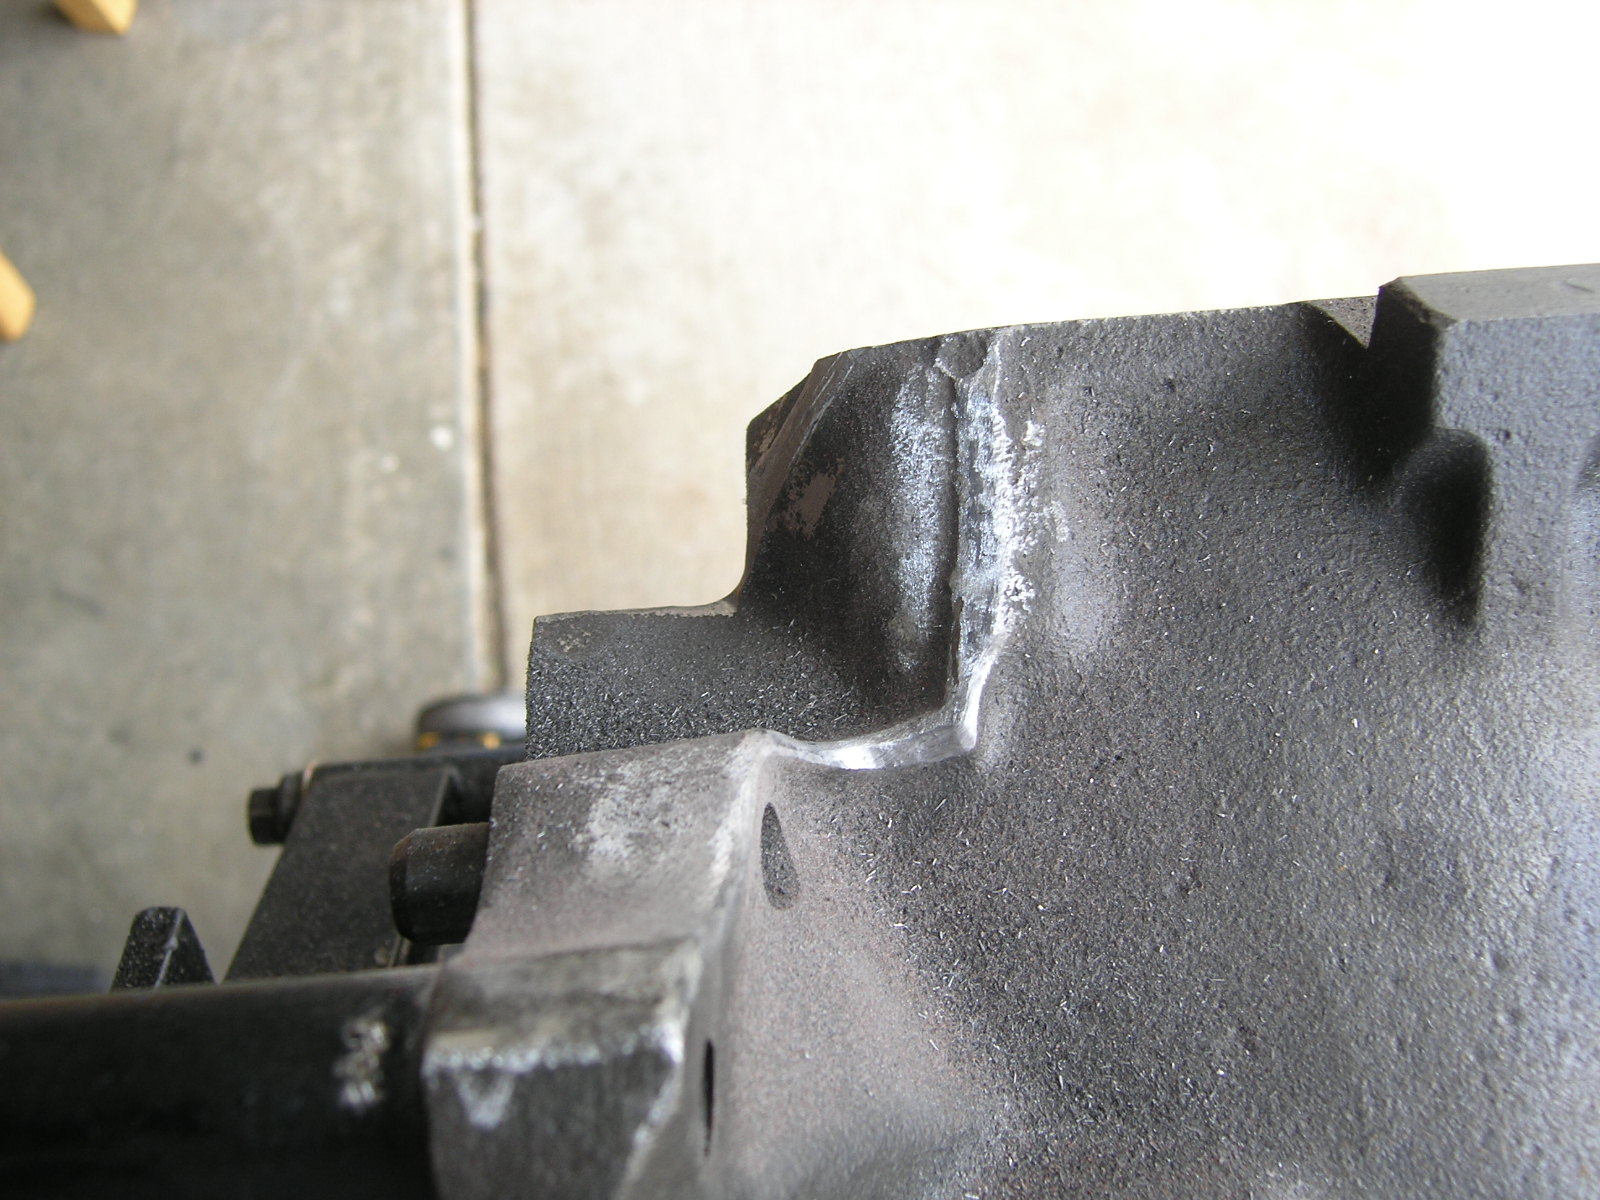
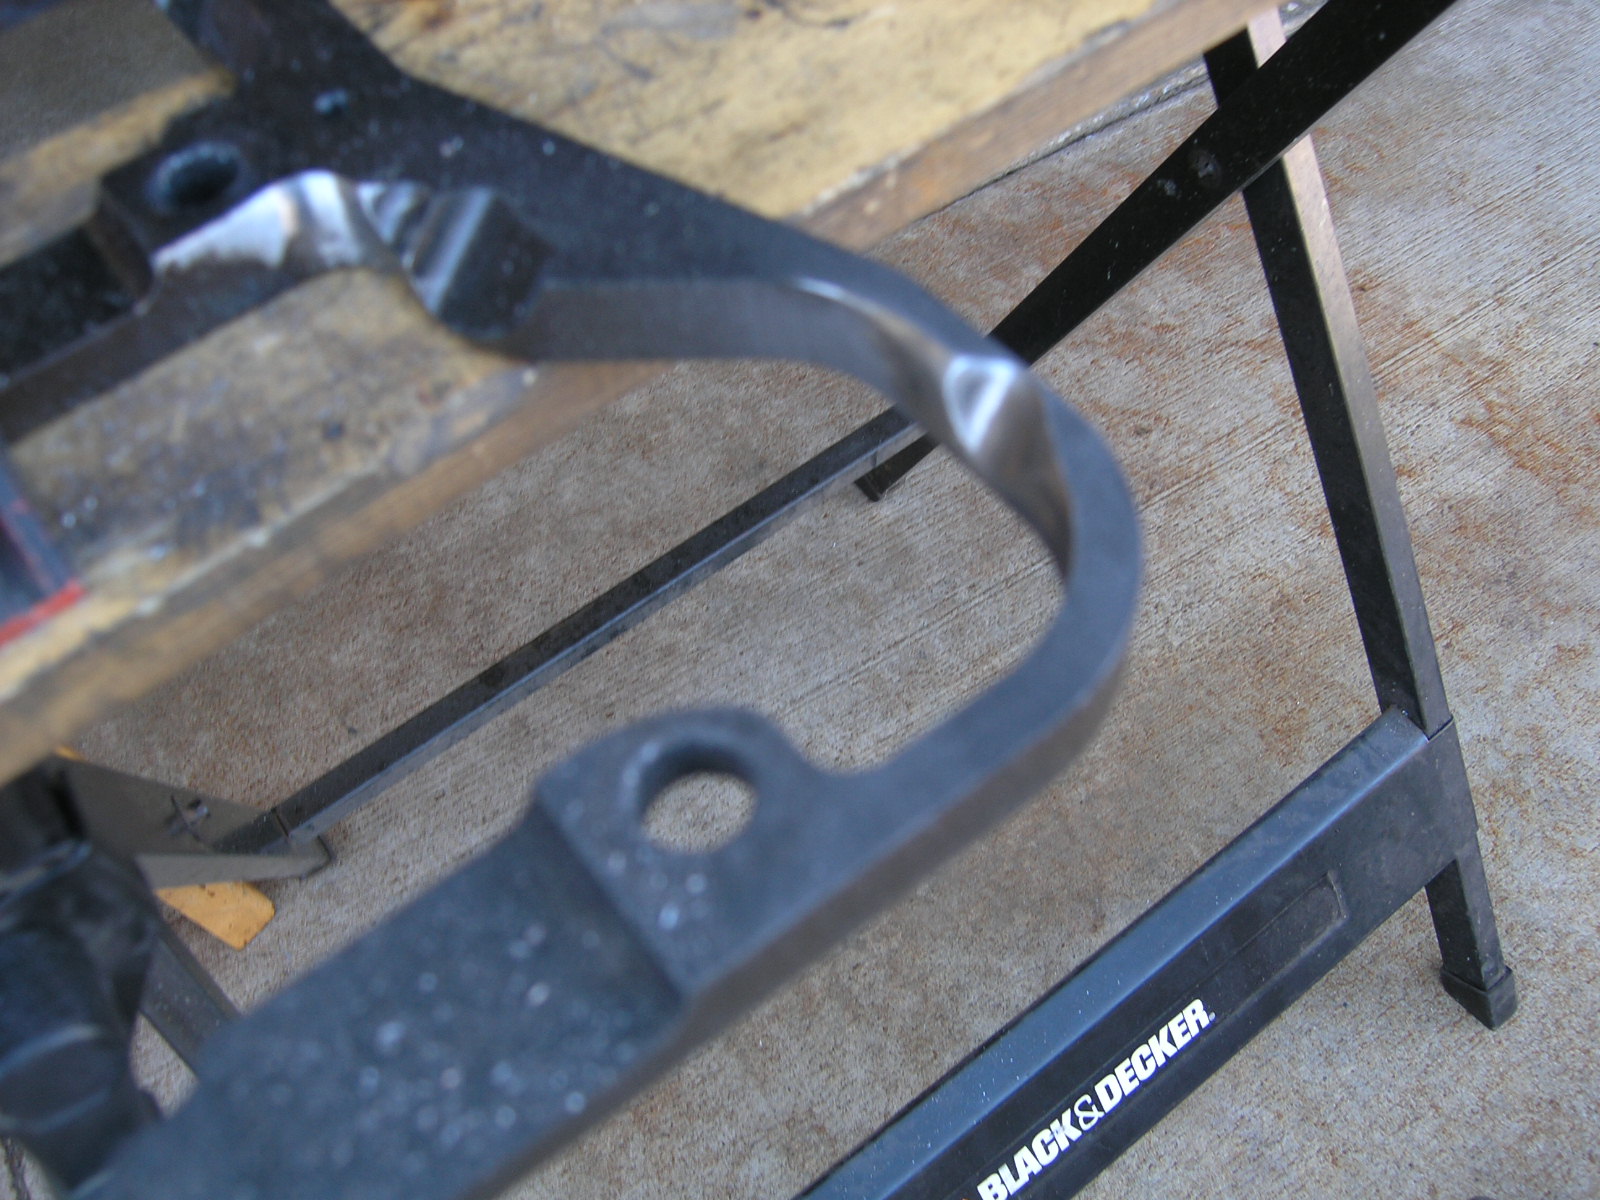
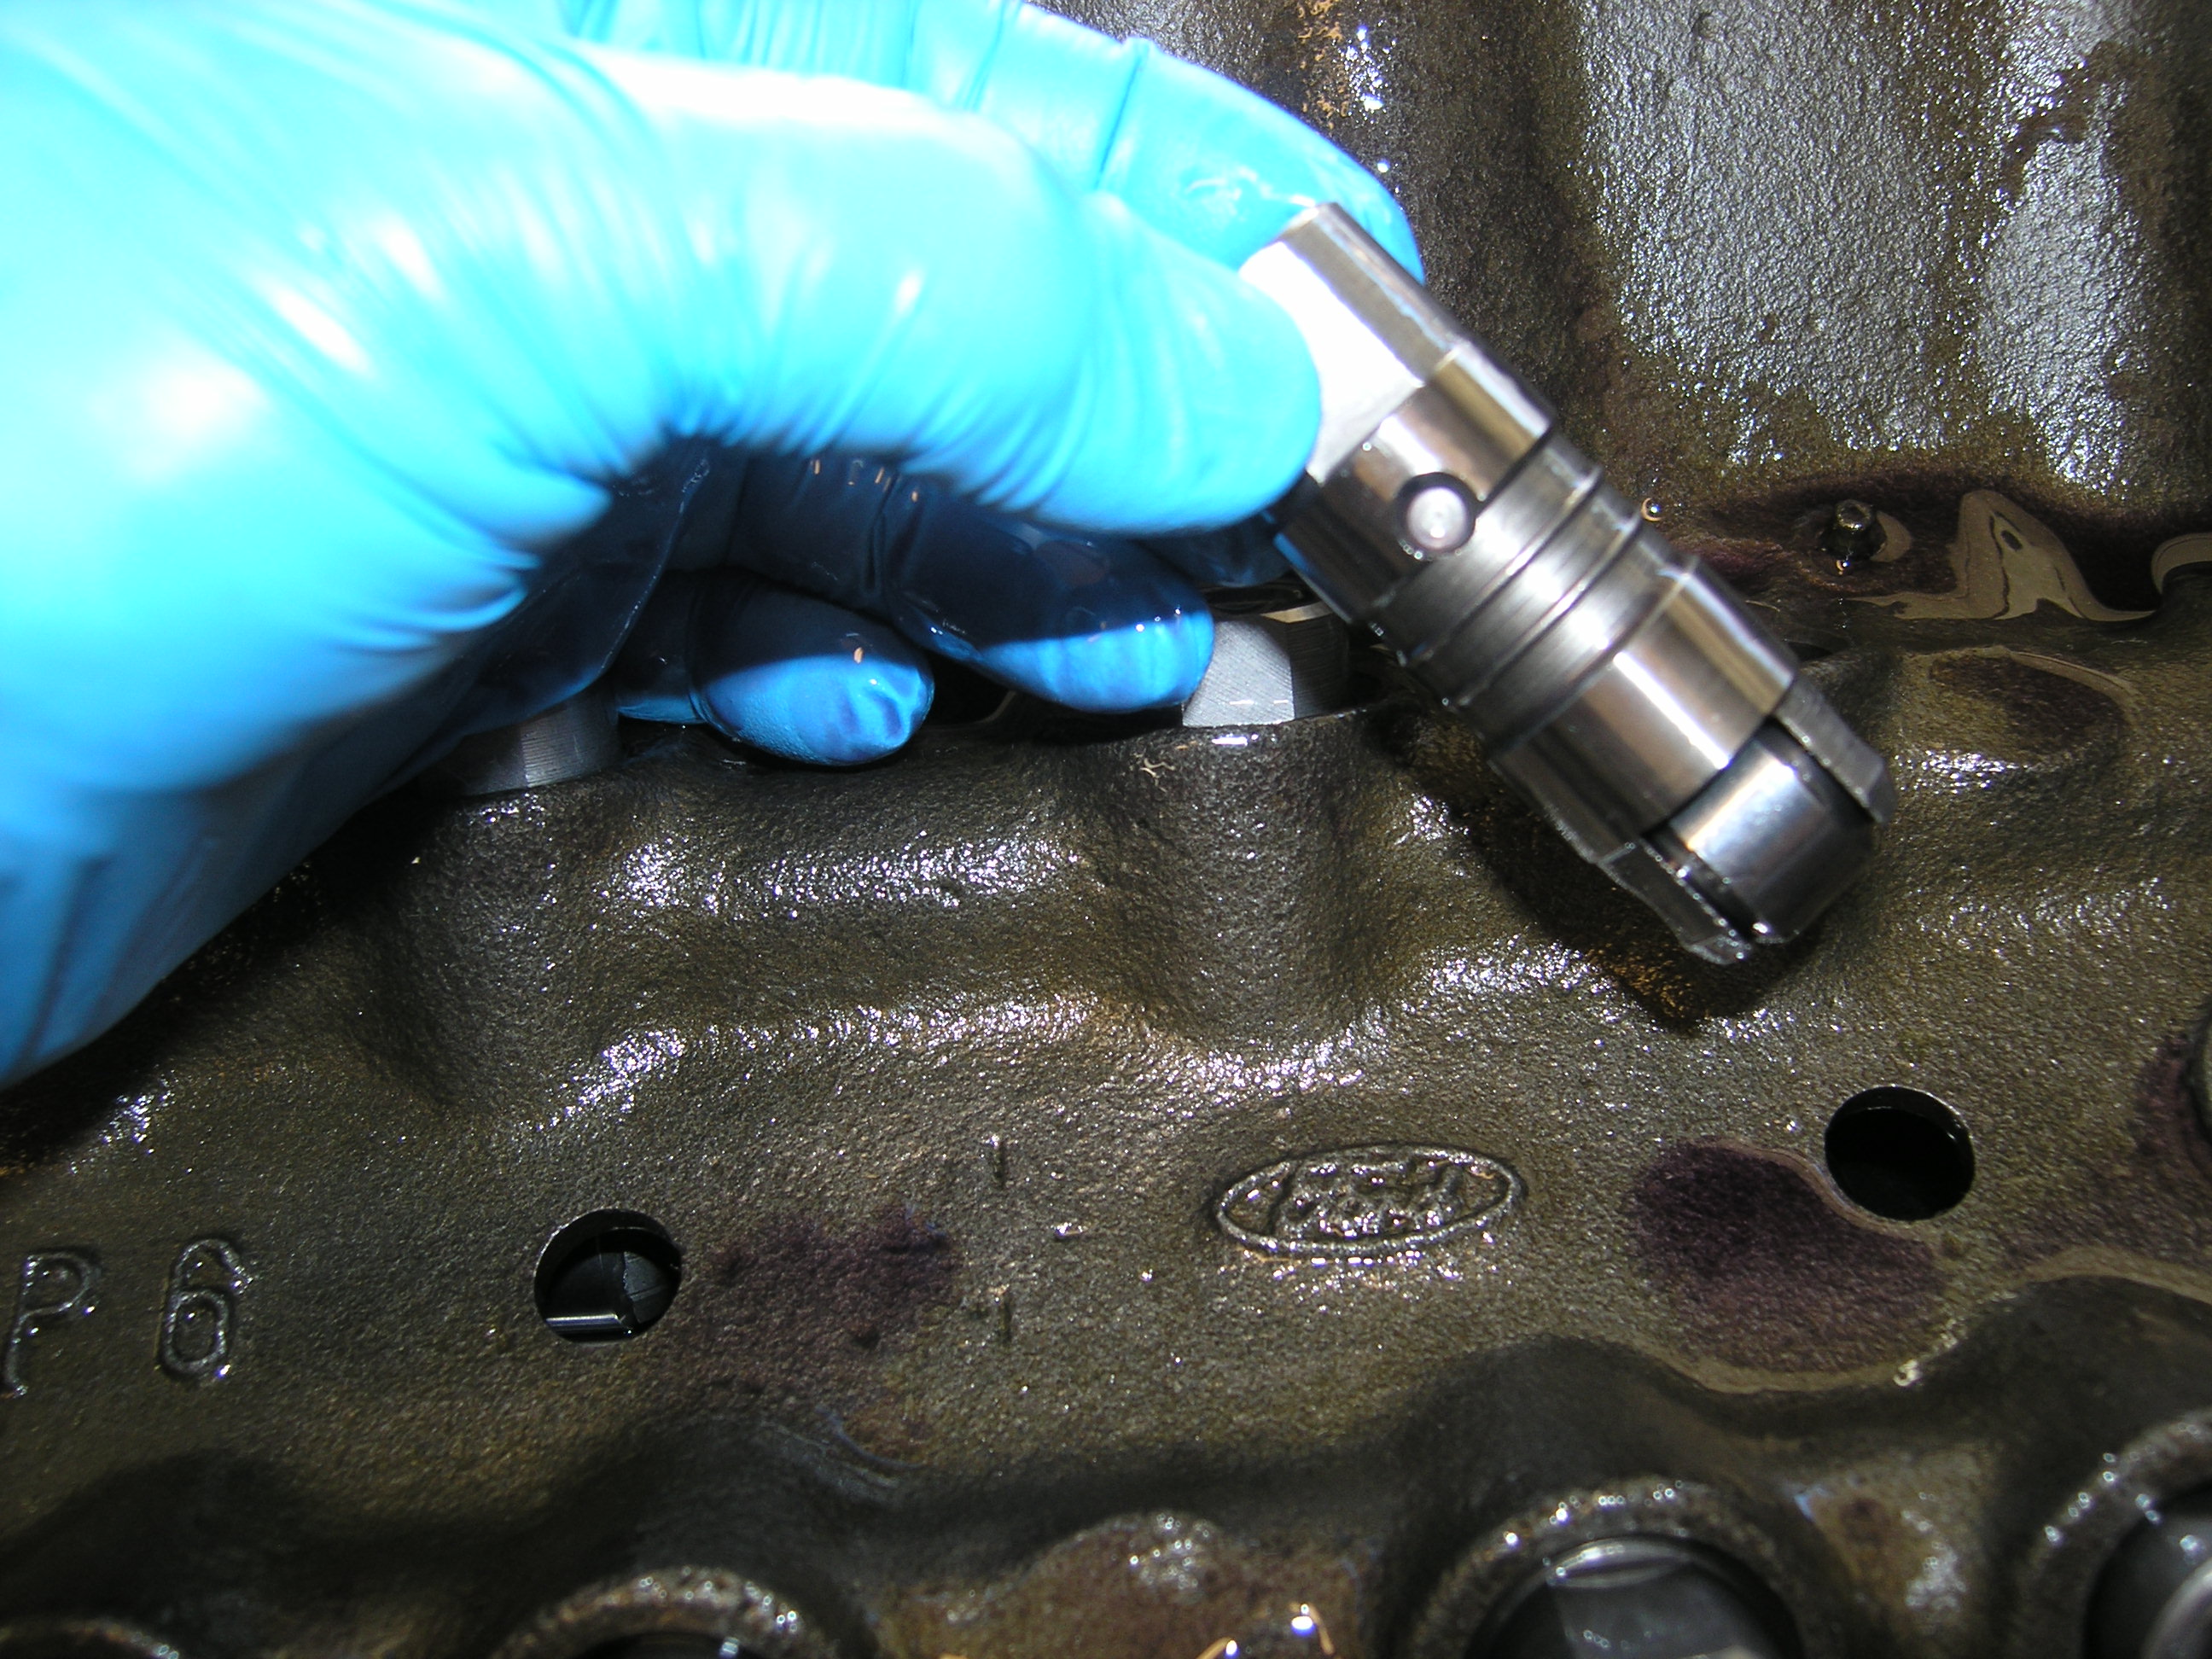
As I mentioned earlier a non-roller block was used over the crack prone later roller blocks. A hydraulic roller camshaft and valve train was to be used so I convered the block to a roller type by installing a Comp Cams conversion kit.  It allows the use of less costly non-link bar lifters. A lifter valley “spider” and “wish bone” alignment links are adapted to the block.

OLYMPUS DIGITAL CAMERA OLYMPUS DIGITAL CAMERA

Two small 1/4″-20 holes are drilled and tapped into the lifter valley floor to hold down the lifter “Spider”. The edge of the lifter valley where the lifter wish bones links sit are clearanced to ensure full movement.

OLYMPUS DIGITAL CAMERA OLYMPUS DIGITAL CAMERA

A set of Dura-Bond high performance camshaft bearing were installed.

OLYMPUS DIGITAL CAMERA OLYMPUS DIGITAL CAMERA OLYMPUS DIGITAL CAMERA

A Comp Cams XR264RF-HR10 small base circle camshaft was used. A small base circle camshaft is required to ensure proper oiling to the lifters. If a standard base circle camshaft is used with the non-link bar style roller lifters they extend to far out of the lifter bore thus blocking the oil passages and greatly reduce the oil moving through the system.

OLYMPUS DIGITAL CAMERA OLYMPUS DIGITAL CAMERA

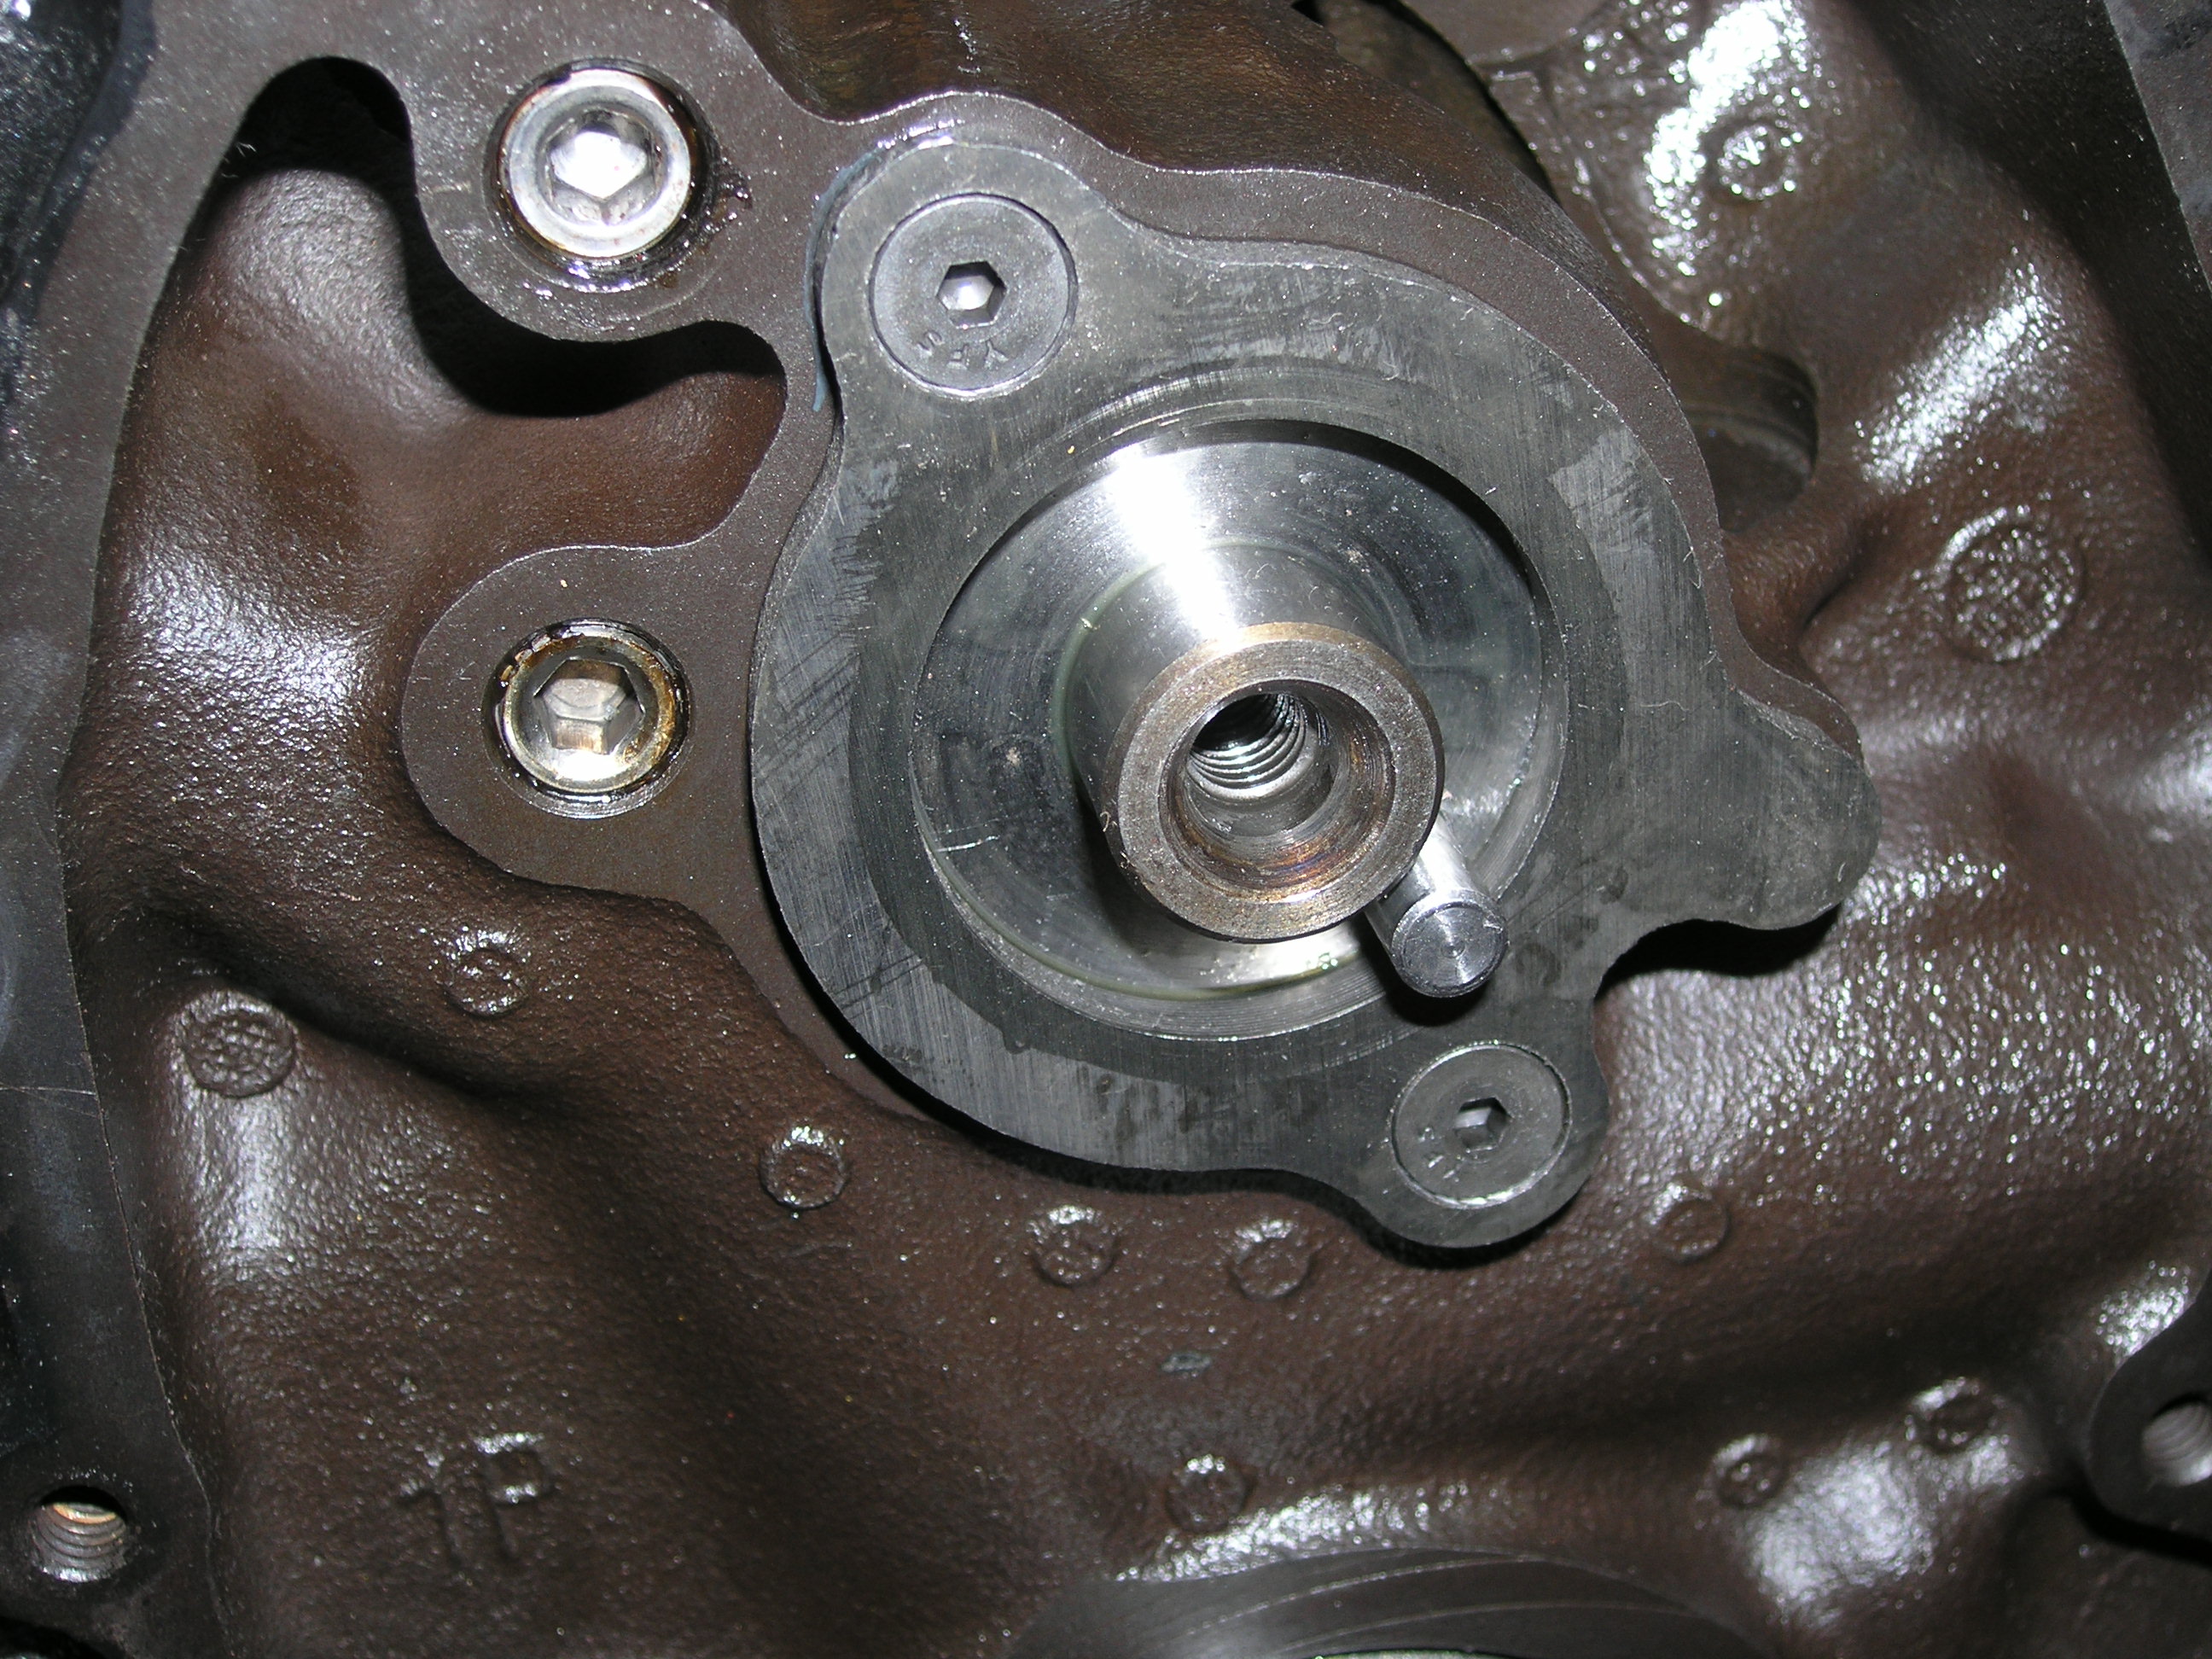
Although it is an non-roller block the roller thrust plate can still be used to keep the camshafts end play in check. Because the block was line honed a -.005 smaller double roller timing chain with a needle bearing thrust washer was used. Notice the flat head allen screws used to hold the thrust plate in place, they are needed to create a flat surface for the timing chain thrust bearing.

OLYMPUS DIGITAL CAMERA OLYMPUS DIGITAL CAMERA

To top of the valve train a set of Trickflow 7.600″ .080″ thick push rods were used along with a set of 1.6 ratio Hardland Sharp full roller rocker arms.

 OLYMPUS DIGITAL CAMERA OLYMPUS DIGITAL CAMERA OLYMPUS DIGITAL CAMERA OLYMPUS DIGITAL CAMERA

Ford 351W (393 Stroker) “Test run”

With the engine complete all that was needed is a quick test run on the engine stand to ensure all systems worked properly.  After setting the intial parameters on the FAST EZ fuel system the engine started right up. The timing was set to 14 degrees at idle of 850 RPM and 36 degrees total all in at 3500 RPM.  As the engine ran I could see the air/fuel ratio’s begin to reach their target settings. The engine is ready to install in the 56″ Mercury Mercuriser and after about a tank of fuel will be fine tuned for many years of trouble free driving.

   Click here to see the engine on the run stand

OLYMPUS DIGITAL CAMERA

450 Horsepower – 500 Lb-Ft Torque Ford 351w / 393 stroker engine.

Contact John@JMacPerformance.com if you’d like more details on this engine build.

550 Horsepower 383 Small Block Chevy

550 Horsepower pump gas 383 Small Block Chevy 

JMac Performance put together a 550 Horsepower pump gas 383 Small Block Chevy. Here are the details from the parts selection to the dyno testing.

550 Horsepower pump gas 383 Small Block Chevy “Parts selection”

I started the build with a good factory block; a 4 bolt main roller block out of a mid 90’s Chevy truck. The mid 90’s truck blocks have thicker castings, 1 piece rear main seal, and are fitted with hydraulic roller camshafts from the factory.

Knowing the 383 would be pushed to its performance limit I used all forged bottom end parts:

CP Bullet pistons, forged 3.75″ stroke crank, and 6.0″ forged connecting rods.


The key to making good horsepower is in the heads, camshaft, intake manifold, and carburetor. I used a set of Airwolf 220e’s, a Dr. J’s match ported single plane intake manifold, custom ground hydraulic roller camshaft from Iskendrian, and a 750 Mighty Demon carburetor.


550 Horsepower pump gas 383 Small Block Chevy “Block Prep”

 I had the block cleaned (hot tanked), bored and honed  .030 over w/torque plate, decked, and line honed. I installed new Durabond performance cam bearings. The performance cam bearings are a little harder that standard bearings so they can with stand higher loads brought on by higher valve spring PSI.   The block was thoroughly cleaned with soap and pressured hot water. All the bolt holes were cleaned with a thread chaser and the camshaft oil galley plugs were taped for allen head plugs.  


The bottom of the cylinders and the oil pan rail had to be clearanced to make room for the  3.75″ stroke crank and 6.0″ rods. The bottom of the cylinders were also chamfered to help reduce friction and piston skirt scuffing. 


To ensure maximum flow out of the oil pump I put a radius on the rear main cap oil hole.


550 Horsepower pump gas 383 Small Block Chevy “bottom end work”

To ensure the 383 will live a long and happy life I mocked up the bottom end and checked all the clearances.

I started with the main journals.  After having the crank polished I got 2.477″ on the main caps and 2.48″ on the crank giving us a solid .003″ clearance. I did the same with the connecting rods; 2.097″ on the rod ends and 2.100″ on the crank giving us the same .003″ clearance.


Next I checked the piston to cylinder wall clearance;  4.026″ on all the pistons, 4.0302″-4.0303″ on the cylinder walls giving us a little over .004″ piston to cylinder wall clearance. All the piston rings were hand filed to top -.019″, second – .023″ , oil ring – .015″ . 

Note:  To help reduce internal friction and free up a little extra Horsepower the CP Bullet pistons had a 1.5 mm, 1.5 mm, 3.0 mm ring pack.   


Before torquing everything in place I set the crank end play at .005″  


After all the clearances checked out I assembled everything together torquing the mains to 65 ft-lb. and the rods bolts to 63 ft-lb. Notice I used ARP bolts on both the rods and the main caps.  

Double checking the deck height we got -.005″ out of the hole.  This set us up with a quench of .036″ which helps reduce the chance of detonation on 91 octane fuel.  


550 Horsepower pump gas 383 Small Block Chevy “Oiling system”

 Leaving nothing to chance I always disassemble the oil pump (Mellings 55HV) and check all the clearances.  Notice the hardened oil pump shaft and welded on oil pump pick up. 

To help reduce windage and free up some more Horsepower I used a 6 qt. oil pan with a built in oil scraper and windage tray.  before bolting on the oil pan I set the oil pump pick to oil pan clearance to 3/8″.


550 Horsepower pump gas 383 Small Block Chevy “Valve Train”

At the heart of this 383 is a list of quality valve train components, starting with the custom Iskendian hydraulic roller camshaft. It is a single pattern camshaft with .595 lift,  244 degrees of duration @ .050 and an advertised duration of 290 all on a 110 lobe center. 

Because of the roller block the factory style hydralic roller lifters (I used Comp Cam lifters), guide plates, and holder were used in place of retro fit lifters.


 To take advantage of the free flowing heads I wanted as much lift as possible so I installed Harland Sharp1.6 ratio rocker arms.

Using custom length Comp Cam one piece push rods allowed for the proper rocker arm geometry.


550 Horsepower pump gas 383 Small Block Chevy “Completed”

 Here’s the completed engine waiting to be tested on the DTS dyno.

After completing a series of tuning pulls here’s a copy of the final numbers

 558 Horsepower @ 6300 – 510 ftlb @ 5000


Click on the links below to watch the this engine on the dyno

558 Horsepower – 510 LB-FT dyno pull

Idling on the dyno


Budget 350 build

Budget 350 build “The Beginning”

I decided it was time to rebuild the small block 350 that had been hiding in the corner of my garage for over 30 years.  It was originally purchased in 1978 as a project engine for my dad’s 1930 Model A coupe.  After some thought and a look at the raising gas prices he decided to stick with his very reliable, more economical 283.        Looking over the VIN number it was discovered our 350 was out of a 1971 Corvette (VO609CJK).  I was hoping to find some high performance parts (Steel crank and a 4 bolt main) underneath the 30+ years of grease and dust.  Unfortunately it was a 2 bolt main block,  stock cast iron crank and, slightly above average 3973487 casting heads.  Not what I had hoped for be still a solid foundation for a nice street engine.

Budget 350 build  “Bottom end work”  

 After the usual tear down and inspection it was determined the 350 needed some work.  It needed to be bore .030 over, the connecting rods needed to be resized, the block needed to be decked, the crank needed to be polished, and the mains were line honed .  Because the pistons needed to be replaced I decided to go with a slightly upgraded Keith Black hypereutectic piston and moly rings.     To top off the short block a new 8″ stock harmonic balancer was installed and the rotating assembly was balanced. With the exception of the pistons the bottom end was stock.  

Budget 350 build “A little head work”

looking over the cylinder heads they also needed some updating.  First thing I did was to have the heads decked about .020″.  (with the new pistons the compression ratio was now 9:1) Then I updated to new stainless steel ferrea’s (1.94″ intakes, 1.50″ exhaust) valves and had them cut with a 3 angle valve job.  To help with the low lift flow numbers I placed a 52 degree back cut on all the valves after the valve job was complete.    When the 487 heads were designed leaded fuel was the norm.  Knowing  this 350 would never see leaded fuel I had hardened valve seats installed on both intake and exhaust making them compatable with unleaded fuel.  The stock exhaust valve rotating retainers were removed and upgraded valve springs, steel retainers, and clip were installed.  To complete the cylinder head upgrade I gave them some pocket porting. I opened up the bowl about 1″ under the valve seat, reduced the valve guide, blended in the new hardened seats, opened up the complete exhaust port, and cleaned up the casting inside the intake port. 

Budget 350 build “Dyno testing”

To complete the build the 350 was bolted together using Fel Pro gaskets, a Mellings standard PSI and volume oil pump, 6 qt.oil pan, stock push rods and rocker arms, Edelbrock Performer RPM intake manifold, MSD street fire HEI distributor, and a Demon 625 carburetor. 

Performing the usual break-in and tuning on the DTS powermark dyno I was able to get the Budget 350 to pump out 356 Horsepower @ 5300 RPM and 386 lb-ft Torque @ 4300 RPM. Not bad considering this engine was rated at 270 Horsepower new from the factory. 


Budget 350 gets a 50 Horsepower tune-up

Budget 350 gets a 50 horsepower tune-up

Making 356 horsepower from the Budget 350 was acceptable for its original purpose, crusing to car shows in a 1930 Model-A Ford.  However, 1.0 horsepower per cubic inch isn’t exactly going to set the performance world on fire. There was definitely more power to be had so I set out to find it. 

Here’s what I did: 

  • Upgrade the rocker arms from stock pressed metal to full roller rocker arms with poly locks.


With the added pressure from the new rocker arms I needed to upgrade to a bolt in stud.  Not wanting to have the stud bosses machined I stopped by my local machine shop (Engine Supply in Santa Ana Ca.) for some help. They recommended a bolt in stud used as a direct replacement for the press-in type currently in the heads. All that I needed was a stud pulled, course thread tap that matched the studs, and of course 16 studs. The use of a  rocker stud removal/tap alignment tool from Comp Cams made the job easy.    


  • Upgrade the camshaft and lifters

I needed to add a little more lift and duration to fulling utilize the ported heads.  I happened to have a Comp Cams XE268H flat tappet cam on the shelf.

  • Increase the size of the carburetor

The last upgrade was increasing the size of the carburetor from a 575 Speed Demon to a 650 Speed Demon.


Budget 350 gets a 50 horsepower tune up “Dyno testing again”

After upgrading all the parts I took the Budget 350 back to the engine dyno.

Click on the link below to watch the engine on the dyno:

Budget 350 dyno pull


In order to get real world numbers  I used the Hooker Super Competition headers and the Magnaflow mufflers from the car it was going in, my 69 Chevelle.   


After setting the timing and re-jetting the carburetor the junkyard 350 made 403 horsepower @ 5700 and 426 ft-lb of Torque @ 4200.

Wanting to get all I could out of this combination I tested several carburetor spacers.


I found the 4 hole 2″ spacer made the best power curve .  It made 400 Horsepower @ 5700 and 430 ft-lb torque @ 3900.  Not a significant change at the peaks from the non-carb. spacer pulls, however the average torque numbers went up quite a bit from 2500 to 4500.  Knowing the car weighs 3500 lb. with the driver that extra torque was worth the loss of horsepower up top.

Here’s a copy of the graph with both dyno pulls.  You can see the difference in the  torque from 2500 to 4500.

Budget 350 gets a 50 horsepower tuneup “Testing in the real world”

After all the upgrading and dyno testing it was time to test the Budget 350 in the real world. I installed it  in the JMacPerformance 69 Chevelle.

A few details on the car:  4:56 gear, 28 x 12.5 x 15 Mickey Thompson ET street rear tires, Turbo 400 transmission, 2800 Stall converter, 6 point roll cage, 3500 lb. with driver. 


I ran it at the PSCA “Spring Break Super Show” held  March 11th – 13, 2011 @ Auto Club Dragway in Fontana Ca.  

It ran a best 12.486 @ 107.43 mph and the engine never went over 6000 RPM.  In fact the shift points were set at 5750 RPM.


The Budget 350 is a solid economical Street/Strip engine. It is a  good example of what can be achieved with good engine building techniques, focusing on the parts that make power (Camshaft, valve train, and heads), and putting together a combination of parts that work together.

600 Horsepower 468 Big Block Chevy Build

600 HP 468 Big Block

JMac Performance is building a 600 Horsepower street 468 Big Block Chevy engine.  As the build progresses I will cover all the details that goes into building a high quality street engine.

As our foundation we’ll be using a Gen V four bolt main 7.4L block

Pictured below are all the  parts that will go into our 468 build

SRP Pistons on Scat 6.385″ connecting rods with ARP bolts

At the heart of the engine is an Isky hydraulic roller cam and Cloyes double roller timing chain

A pair of Profiler 290cc aluminum cylinder heads will take care of the intake and exhaust flow

600 HP 468 Big Block “The beginning”

We start our build with a Gen V – 4 bolt main 7.4L (454) block. The block gets fully machined; Hot tanked, magged for cracks, line honed, bored .030 over, and decked to zero deck height


The extra casting (flash) is removed and all the threads are individually cleaned with a thread chaser.

 New cam bearings are installed

After boring and honing the cylinders they are chamfered on the top and bottom. (The top to help with the piston and ring installation, the bottom to reduce internal friction and eliminate scuffing of the piston skirts)


600 HP 468 Big Block “Checking bottom end clearances”

 To insure our 468 will live a long and happy life we need to check all the clearances of the bottom end.  We started out by cleaning and deburring all the bearings.  This is a step most engine builders delete. I like to verify the quality of the bearing finish and insure they are burr free before installation.

I  installed the main caps and the bearings then torque them to spec.  In this case 100 ft-lb.  (Note: For added insurance we replaced the stock main bolts with ARP bolts.)

 I used the micrometer to verify the crank main journals (2.748″)  then I used the bore gauge on the main bearings (2.751″) to get our (.003″) bearing clearance.

I did the same with the rod journals (2.194″),  torqued the ARP rod bolts to 63 ft-lb, I used the bore gauge to verify the connecting rod bearings (2.219″)  to get our (.0025″) bearing clearance.  (Note: The use of the rod vise when torquring down the rod bolts)

The first set of rod bearings yielded a (.003″) clearance, a little too wide for our application. The wider rod bearing clearnace would have resulted in lower oil pressure. After installing a slightly under sized bearing we got our (.0025″) clearance.

THIS IS WHY YOU HAVE TO CHECK EVERYTHING!  Leave nothing to chance.


Once the bearing clearances were verifyed I installed the crank and checked the end play.  It was a little tight (.003″)  with a few taps of the rubber mallet got me (.006″) end play.

600 HP 468 Big Block  “Bottom end installed”

 I used the micrometer to check the Forged SRP piston diameter (4.277″)

then I checked the cylinder diameter with a bore gauge (4.281″) subtracting the two and we get (.004″) piston to cylinder wall clearance.

To insure proper cylinder sealing and minimize oil consumption the ring end gap needs to be set.  I used a set of Total Seal file fit rings which are (.005″) larger than the bore diameter. This allows the builder to cut the rings to the exact size for each cylinder.  The ring manufacturer calls for a  (.019″) top ring and (.016″) second ring end gap.  Each ring is hand filed and fitted to its specific cylinder.


The pistons are installed and I check the deck height (.000″)


After the pistons and rods are torqued down the rod side clearance is checked (.023″ – .024″)


600 HP 468 Big Block “Camshaft and oiling system installed”

I  buttom up the lower end with the installation and degreeing of the camshaft. I’m using Isky hydraulic roller cam 396282/294. After adjusting the crank sprocket the final resting position for the camshaft is +3 degrees advanced


Unlike flat tappet camshafts roller cams rely on backing plates or cam buttons to limit camshaft movment.  I installed a timing chain with a Torrington bearing to help minimize the internal friction between the timing chain and the block.  Because after market Gen V Big Block timing chain covers are hard to come by I  modified the existing timing chain cover.  I welded on an additional plate to stiffen up the cover.  By doing so I was able to get the proper camshaft end play of (.005″)


Oil control is key to freeing up extra Horsepower so I installed a Moroso 7 Qt. pan and a oil scraper.


The oil pump pickup to the bottom of the oil pan clearance was checked (3/8″) and the oil pump pickup was tack welded to the pump for added protection.


600 HP 468 Big Block “Heads, valve train, and induction system installed”

Before bolting on the heads and valve train I needed to verify the valve to piston clearance.  I placed small chunks of modelling clay in the valve reliefs.

The head gaskets were installed and the heads bolted in place

The rocker arms, lifters, and push rods were installed (Note: because the push rod length was not known at this time I used two adjustable push rods) The engine was rotated two full cycles, the heads were removed, and the clay was inspected.

Piston to valve clearance on the intake (.220″) and exhaust (.200″). More than enough for our application

The valve train geometry and push rod length was verified. I marked the valve tip with a sharpie pen, install the valve train and rotated the engine one full cycle. This process was repeated until I got the witness marks in the middle of the valve tip.

The push rods lengths ended up at (7.650″ and 8.650″) and a set of Manley push rods were ordered

The heads were bolted on, the Isky hydraulic roller lifters, Manley push rods, and Crane rocker arms were installed.

The build was finished off with the  installation of an Edelbrock Performer RPM Air-Gap intake manifold, Speed Demon 850 CFM double pumper carburetor, and MSD billet distributor


600 HP 468 Big Block  “Dyno Testing – Judgement Day”

To insure we got all the performance out of our 468 build it was run on a DTS Powermark engine dyno at Saddleback Community College in Mission Viejo Calif.

I did an  intial 15 minute break-in then a few short pulls to verfy timing and set the air/fuel ratio.  After a quick cold down period we let the 468 go pulling it to 6500 RPM

624 Horsepower – 590 lb-ft Torque,  on 91 Octane pump gas.

Click here to view the JMac Performance built 468 on the dyno


This engine is a great example of what can be done when the proper parts are used, the proper engine building techniques are implemented, and nothing is left to chance.

Contact John@JMacPerformance.com if you’d like more details on this engine build.